Cleaner Cuts with a Miter Saw
Follow a few easy tips for crisp, clean miter saw cuts.
A quality miter saw is a joy to have around the shop for all sorts of jobs – trimming a too-long tenon, mitering custom moldings for a picture frame, bringing long stock down to size before surfacing or cutting a pile of face-frame rails to length...It whips through these tasks quickly, accurately and cleanly. What's that, you say? Your saw isn't quite the star performer you wish it could be? Well, if your trouble is tearout, here are a few simple tips that should help your saw clean up its act.
Give that Blade a Bath
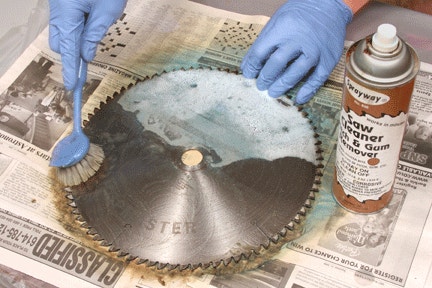
Your saw blade needs clean, sharp teeth in order to cut neatly. Sounds logical, right? If you can’t remember the last time you had your blade off the saw, much less cleaned it, it's high time to do your chores! Burned-on accumulations of gum and wood pitch not only gunk up sharp edges so they cut poorly, but also overheat the blade and damage the carbide. Don’t wait for dull teeth! Grab some blade cleaner and a soft bristle brush and go to work. Then, when the blade is clean, have a close look at every tooth. If you find more than a couple of chipped teeth, consider having the blade resharpened, or buy a new one.
Add Some Teeth for Better Bite
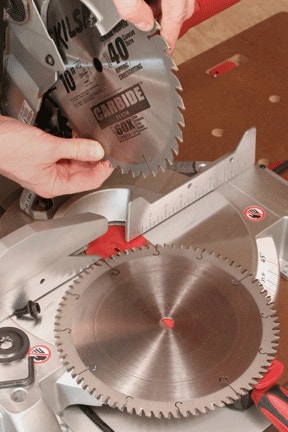
Miter saws usually leave the factory with a 40- to 60-tooth standard-duty blade. That's an acceptable choice for framing walls or breaking down rough stock, but it's not ideal for fine woodworking. If you want polished-smooth cuts with little or no tearout, you should splurge for an 80- to 100-tooth crosscutting blade. Sure, it's an investment that may cost you $100 or more, but you'll see the difference in cutting quality immediately. You'll probably also find that a top-quality blade lasts a really long time before the teeth need resharpening.
Give Your Throatplate a Lift
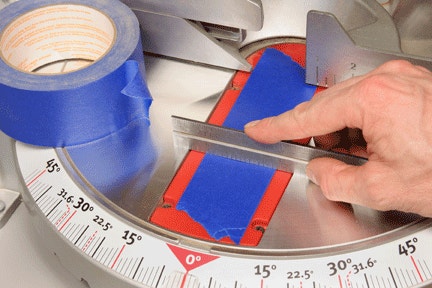
When a miter saw blade plunges down through the wood, any gap between the wood and the throatplate underneath will leave the weak surface fibers unsupported. That’s a recipe for splintering on the bottom face. Use a straightedge to check whether or not your throatplate is flush with the saw table. If you find a gap, stick a few layers of tape down over the throatplate to build it up. Then, slice the blade through it, and leave the tape in place.
Create a Tighter Squeeze
Some throatplates can be closed up on either side of the blade by loosening the attachment screws and sliding the plates together. If your saw has this nifty feature, close up the kerf until the throatplate nearly touches the teeth. Effectively, you're creating a "zero-clearance" opening for the blade.
Back-up Scraps to the Rescue
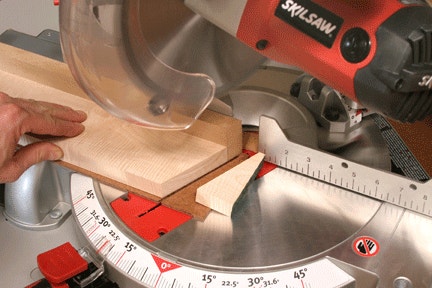
If you've got a pile of scraps near the miter saw, why not put them to good use for tearout prevention. Place a long scrap of hardboard or thin plywood on the saw table, and butt a second scrap against the fence. The two will form a nice pocket for backing up your workpiece from below and behind – the areas most prone to splintering
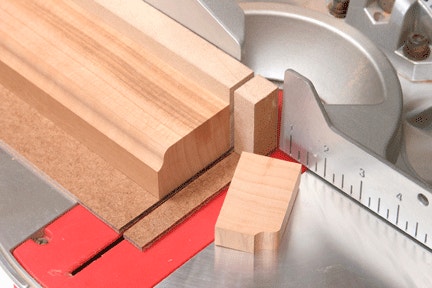
The scraps should be wider and taller than the workpiece to provide optimal support. Now, hold both the scraps and the workpiece securely, and cut through all three. You'll be amazed at the quality of the sawn edge!
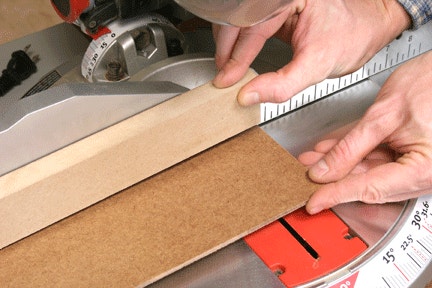
Score First, then Make the Cut

Here's one more cure for tearout. On splinter-prone woods such as cedar or red oak, score a cutting line around the faces and edges of the workpiece with a sharp razor knife before taking it to the saw (see Photo 6). Line up the side edges of the saw teeth carefully with your knife line, and make the cut. Since the wood fibers are already severed, the blade can’t break them loose on the way out of the cut. Presto! A clean edge.


Keep the inspiration coming!
Subscribe to our newsletter for more woodworking tips and tricks