Jigs for Making Straight Cuts with a Circular Saw
Every shop should have a circular saw. A couple of simple jigs will keep it cutting straight and true.
In a busy shop, work surfaces and jig facings sure take a beating. Melamine can offer some degree of improved durability, but it doesn't hold a candle to cabinet-grade plastic laminate. "Real" laminate will protect worktables from glues, finishes and other chemicals, and it will help your most-used jigs bear the brunt of repeated use. Laminate is quick and easy to install. You'll learn the basics in the following eight steps.
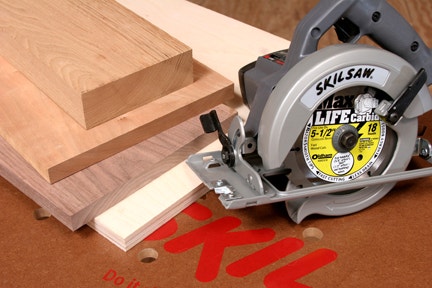
Once you've got a table saw, who needs a circular saw? Well, truth is, we all do. A circular saw is perfect for slicing up plywood and other sheet goods so they're safer to maneuver over a table saw. The first time you try to heave a 100-pound sheet of MDF up and onto your saw, you'll see just how valuable a little circular saw can be. Unless you use a circular saw every day, however, trying to eyeball a straight cut across a sheet of plywood is like steering a boat without a rudder. More than likely, you'll drift off course and bind the blade. A scrap-made jig can solve that problem once and for all. These two options will put your mind at ease and keep your cuts arrow straight.
Straightedge Jig
This straightedge jig consists of a 1/4-in. plywood base with a fence screwed to it. That's it! The edge of the base lines up exactly with your saw's blade, because you'll use your saw to trim the base to the perfect width. So, it's easy to set the jig precisely for the cut you want to make: just line up the edge of the base with your workpiece layout marks and clamp it down. The fence backs up your saw base and keeps the blade tracking straight through the cut. Here's how to make it:
Step 1: Rip a piece of 1/4-in.-thick plywood or hardboard about 10 in. to a foot wide and at least 4 ft. long. This way, you can use the straightedge for crosscutting full sheets. You could make an 8-ft.-long base as well and use it for long rip cuts.
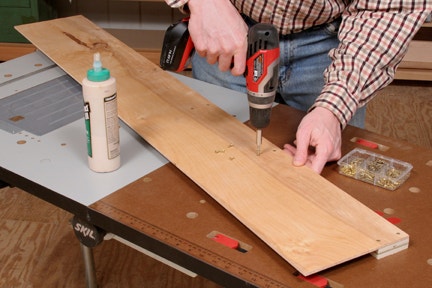
Step 2: Rip a straight piece of 3/4-in. wood or plywood to serve as the jig's fence. Make your fence a couple of inches wider than the distance your circular saw motor overhangs its base. The extra fence width will allow room for clamping the jig in place. Align the ends and one long edge of the base and fence, and fasten them together with glue and 3/4-in.-long flathead wood screws.
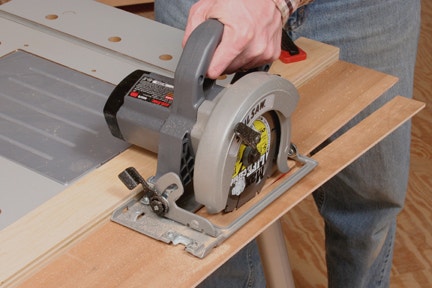
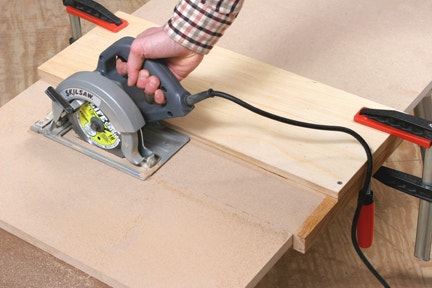
Step 3: Clamp the straightedge jig to the edge of a workbench, and set your circular saw so the blade will cut through the base. Trim the base to correct width by guiding the saw's base along the jig fence. Be sure to use a sharp, carbide-tipped blade or plywood-cutting blade to trim the base neatly.
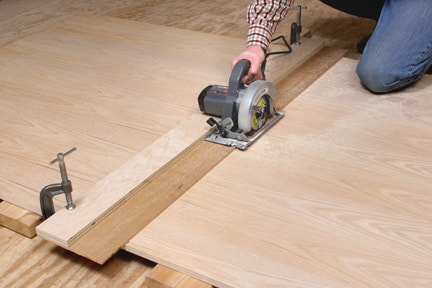
Step 4: Now that your straightedge jig is custom-fitted to your saw, using it is a snap. To cut a sheet, first raise it off the floor with scrap blocking to create a clear space for the blade. Make sure the whole sheet is supported adequately and on both sides of the cut. Draw tick marks on each edge of the sheet to mark the cut, and line up your straightedge base with the layout marks. Clamp the jig securely to the sheet, and you're ready to go.
Crosscut Jig
Here's another simple jig that uses a stop bar to position the jig's fence squarely across a workpiece. One end of the stop extends beyond the fence to register your saw blade with layout marks on a workpiece. This jig is handy for making square crosscuts on narrower stock or zipping across quarter sheets of plywood. Here's how to make it:
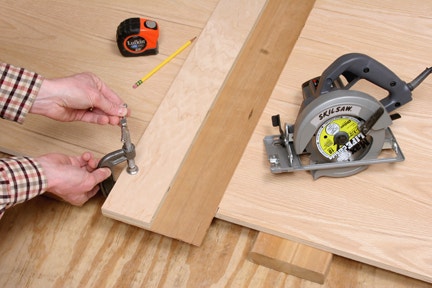
Step 1: Cut an 8- to 10-in.-wide piece of 3/4-in. plywood for the jig fence. Make the fence 25 in. long. Cut the fence to length carefully so the ends are precisely square. Rip a strip of solid wood 1 1/4 in. wide and 12 to 14 in. long for the jig stop.

Step 2: Fasten the fence and stop together so one end of the stop aligns with one edge of the fence. Attach the parts with 1 1/2-in. flathead wood screws driven into countersunk pilot holes.

Step 3: Trim the overhanging end of the stop to the correct offset for your circular saw. To do this, fit the jig over a large piece of 2x scrap, and clamp both parts to your workbench. Guide the base of your saw against the jig fence with the blade set to cut through the full width of the stop.

Step 4: This jig is ready for use! All it takes is a single tick mark on a workpiece to set up an accurate crosscut. Line up the end of the stop with your mark, clamp the jig and make your cut. Quick, easy, and best of all, straight!


Keep the inspiration coming!
Subscribe to our newsletter for more woodworking tips and tricks