Circle-cutting Jig with Fine Adjustment
Made from 1/2" plywood, this basic jig allows you to cut out or shape accurate circles, semicircles and arcs using a standard jigsaw or router.
Cutting a perfect circular disc out of solid wood or plywood isn’t a particularly daunting challenge — if you use a good circle-cutting jig. This one is useful not only for sawing arcs and rounds up to a whopping four-foot radius, but the base also accepts a router, for curvy shaping work. The jig, shown in the Drawing above, consists of three parts:
1. A banjo-like-shaped base plate that mounts to the jigsaw or router.
2. A long pivot bar with holes at regular intervals that serve as pivot points for different radius cuts.
3. A connector bar that joins the two parts with a sliding joint that allows fine adjustment of the jig's cutting radius.
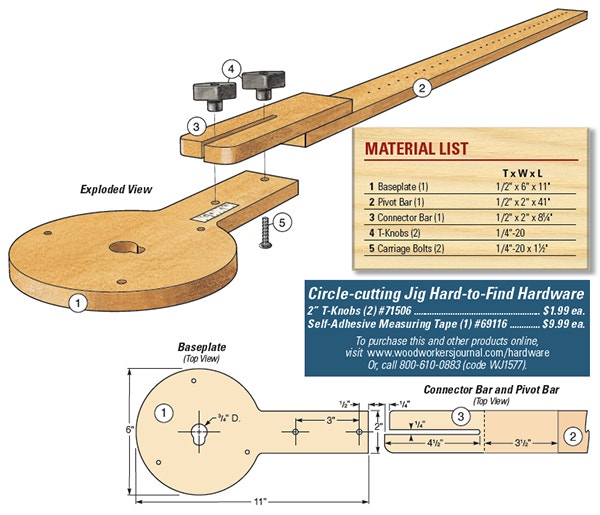
Materials List
1. Baseplate (1) - 1/2" x 6" x 11"
2. Pivot Bar (1) - 1/2" x 2" x 41"
3. Connector Bar - (1) 1/2" x 2" x 8-1/4"
4. T-Knobs (2) - 1/4"-20
5. Carriage Bolts (2) - 1/4"-20 x 1-1/2"
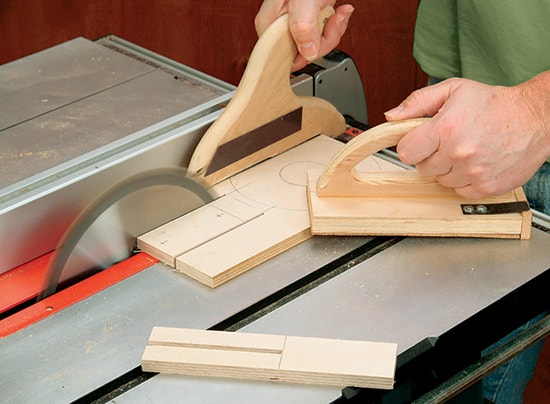
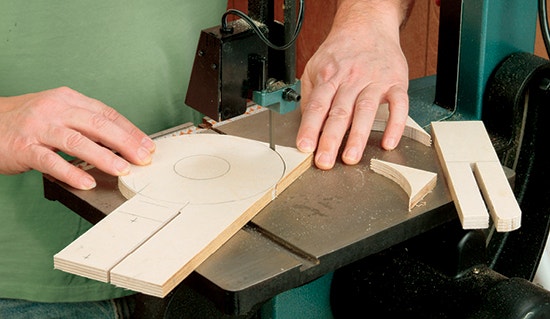
All jig parts are made from 1/2"-thick high quality plywood, such as Baltic birch. Start by sawing out the jig's 6" x 11" baseplate. First, make two parallel cuts on the table saw to form a 5"-long, 2"-wide tongue on one end of the rectangular piece. On the band saw, cut out the 6"-diameter round portion of the baseplate.
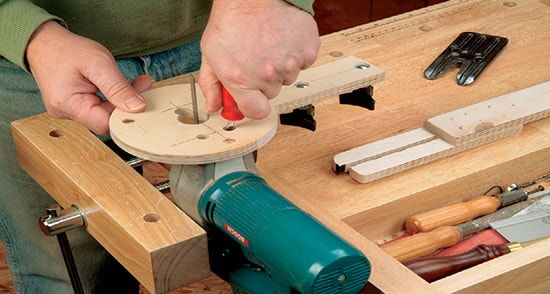
Moving to the drill press, bore a 3/4" hole through the center of the base’s round part and a pair of countersunk holes in the tongue part for two short 1/4" carriage bolts. Now bore a series of countersunk mounting holes to attach the base of your router (with its subbase removed), as well as holes for mounting a jigsaw (with its foot plate removed). For proper cutting action, the jigsaw should be positioned with its blade teeth centered on the round baseplate, with the saw's body perpendicular to the baseplate's tongue and facing to the left (for right-handed users).
From 1/2" ply, cut a 2"-wide, 41"-long strip for the jig's pivot bar as well as an 8-1/4"-long piece for the connector. Using a dado blade in the table saw, cut a 1/4"-wide, 4-1/2"-long slot in the connector bar. On one side of the slot, cut the bar back 1/4" and radius the outer edge of the other, then mark its tip with a black marker pen. The tip acts as a pointer, for fine adjustments. On the pivot bar, mark out 37 pivot holes 1" apart and drill them with a 1/8" bit chucked in the drill press.
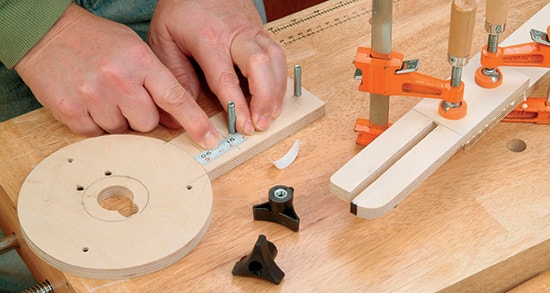
Glue and nail the connector to the end of the pivot bar, positioning it as shown in the Drawing. Apply a short length of sticky-backed measuring tape to the top of the baseplate's tongue. As you'll use only the fractional graduations on the tape for fine adjustments, you can use a scrap of measuring tape left over from another jig project. Now slide the slotted end of the pivot bar onto the carriage bolts on the base and secure the connection with a pair of T-style or other hand knobs.
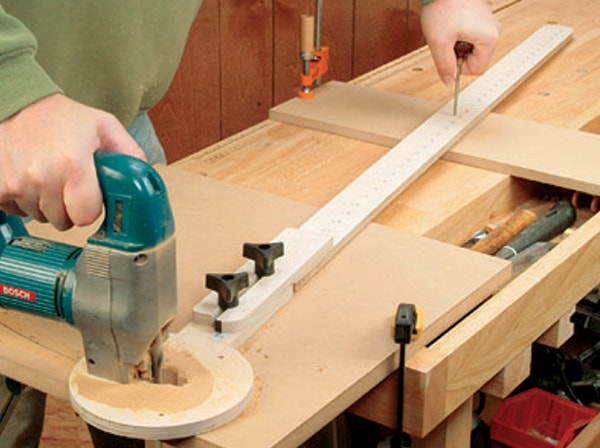
Setting Up for Cutting

To use the jig to cut out a round tabletop, arch-top panel, etc., set a scratch awl or nail into the pivot hole that's closest to the radius of the desired circle or arc. To set the exact radius, measure the distance from the pivot hole to the saw blade, then loosen the hand knobs and slide the connector bar in or out as necessary, then retighten the knobs. Starting with the blade/bit at the edge of the work, pivot the jig around smoothly as you cut.

It's best to take a trial cut and check the radius; if it's off, you can use the scale and cursor to tweak the setting. When used with a router, the circle jig is capable of accurately routing radius slots, creating curved recesses for line inlays, or for decorative shaping work.


Keep the inspiration coming!
Subscribe to our newsletter for more woodworking tips and tricks