Building Upper Kitchen Cabinets
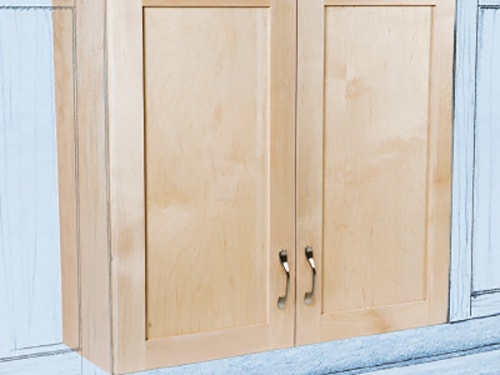
Even spectacular upper kitchen cabinets can be made simply with only a few pieces of hardware and some relatively straightforward construction.
Because of its simplicity, a wall cabinet is ideal for demonstrating the key benefit of frameless construction. You could call it "Just-in-Time Assembly." If I were to build new cabinets for our kitchen, JTA would definitely tilt me to frameless construction.
With my basement shop, I have no idea where I would warehouse two dozen boxes during a prolonged, sporadic construction process. That's a big challenge in building conventional face-frame cabinets. You assemble the boxes, then make the face frames to fit them. Then follow up by making the doors and drawers.
For the Upper Kitchen Cabinet Drawings and Materials List in PDF Format, click here to download the PDF.
With frameless construction, you make all the parts before assembling anything. Storing stacks of parts requires much less space. Moreover, if you are the installer as well as the cabinetmaker, you can move the stacks of parts to the kitchen — lots easier than maneuvering assembled boxes through the house — and actually assemble the boxes right there. All you need for assembly — whether in the shop or on the job site — is a pair of sawhorses, four to six clamps, a drill-driver, screws, biscuits and glue.
Frameless Construction
Frameless construction developed in post-World War II Europe. The goal was to produce attractive and flexible cabinetry inexpensively. Standardization — of cabinet dimensions, of joinery, of fittings and features — is the linchpin.
The cabinet boxes are completely undifferentiated. Their sides have two bottom-to-top columns of 5mm holes, spaced 32mm apart center-to-center. Door hinges and drawer runners fasten to these holes. Shelf support pins plug into them. Any box can be filled with drawers or with shelves behind doors or with a combination of drawers and doors.
A cabinet's appearance is defined by the style and arrangement of doors and drawer fronts. These overlap the front edges of the case, and only narrow gaps separate one from another.
The joinery — biscuits reinforced with screws — is easy to cut, self-aligning, and strong. Assuming your saw cuts are square, the boxes go together without trouble and clamp up square right from the get-go. Run screws into the joints and you can immediately yank the clamps to use in assembling the next box.
A tenet of building frameless cabinets is that you take every part as close to completion as you can before assembly. That easily includes applying finish to all appropriate surfaces.
Cut the Box Parts
Begin with a sheet of 3/4" plywood. And once again, I’d recommend using prefinished plywood. It has a catalyzed coating far tougher than anything you can apply in a home shop. You can buy plywood with the finish on one or both faces. One side is good. Orient it to the inside of the cabinet.
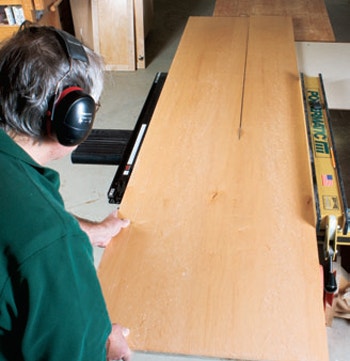
Cut the sheet lengthwise, either on the table saw or with a circular saw guided along a straightedge, to get a 23"-wide piece. The factory edge isn't reliably straight, so it should be removed as you recut this strip — again lengthwise — into two 11-1/4"-wide strips.
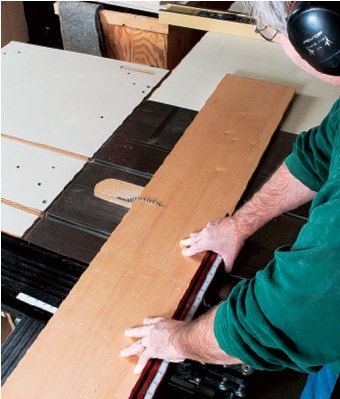
From the two strips, cross cut two 30"-long sides and a top, bottom and cleat blank, all 28-9/16" long. You'll have enough left to make one shelf, 28-5/16" long. If you want more than a single shelf, you'll have to cut the remaining half-sheet of the plywood. The lengths must be precise, and the parts must be square. There's enough excess in the strips that you can cut the parts to rough length with the circular saw, then square one end and recut them to exact length. Make the latter two cuts on the table saw with a sliding table or crosscut sled.
It is important to check your crosscut sled to be sure its fence is square to the saw blade. (If it isn't, reset the fence to make it dead-on square!) Trim one end of each part to square it. To keep things clear, mark the edge you set against the sled’s fence, and the end you cut.
Next, cross cut the parts to length. Flip each piece so the marked edge is again against the sled’s fence. And use a stop clamped to the fence to ensure like parts are identical. Rip the cleat blank into two 4"-wide pieces. Cut the top to a 10-3/4" width and the shelf or shelves to 10-1/2" wide. Finally, cut the back from a piece of 1/4" plywood.
Cut the Joinery
The wall cabinet's construction duplicates that of last issue's base cabinet. The top and bottom, along with a pair of cleats for mounting the cabinet, are captured between the sides and located with biscuits. Screws reinforce the glued biscuit joints, but in this cabinet, the screws are driven through pockets formed in the outer surfaces of the top and bottom. The outer faces of the sides are unblemished.
It's worth noting that you can use this joinery approach in a base cabinet that has an exposed side. And contrariwise, you can run screws through the sides of a wall cabinet if the sides won't be exposed.
Begin this phase of the work by rabbeting the sides and the bottom for the back. The rabbets are 1/2" wide by 1/2" deep. Cut into the finished face if you are using pre-finished plywood. The rabbets will identify the back edge of these parts.
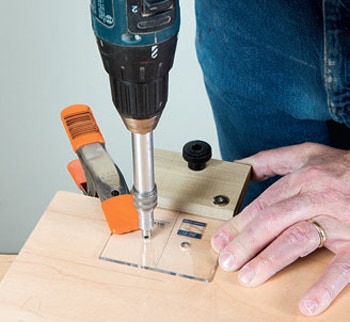
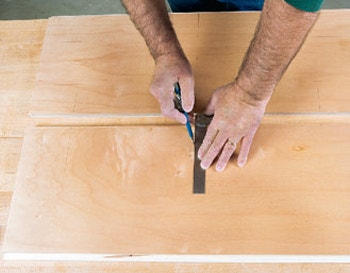
Commercial templates expedite drilling the pilots and pin holes, especially if you are making not just one cabinet, but a half-dozen or so for your kitchen. All you do is fit the templates onto the inner face of a side, so the fences are snug against the front edge of the side. Clamp it to ensure it doesn't shift as you drill. Referencing the label on the template, mark the top end of the side. Then drill the four pilot holes with a #6 self-centering bit.
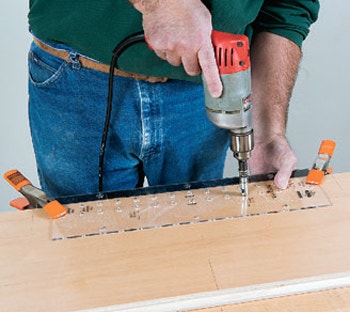
Switch to the 1/4" self-centering bit and shelfpin template and drill all the shelf-pin holes. Unclamp the template, flop it over, and snug the fence against the shoulder of the rabbet. Reclamp the template and drill just the shelf-pin holes. Unclamp and remove the template. Now you're ready to work the mating cabinet side.

Lay out and cut the biscuit slots next. Refer to the Drawings. Slots are cut into the inside faces of the sides, top and bottom, the ends of the top, bottom and mounting cleats, and the edges of the cleats.
Be consistent in your slotting technique so mating parts align properly. As a practical matter, it's impossible to cut the slots deadcenter on the edge of plywood that‘s 23/32" thick. What works for me is to always work on a flat surface — such as the table saw — and to always use the base of the biscuit joiner as the reference (not the fence). And always orient the workpiece surfaces that must be flush when assembled down on the work surface. This way the slots will be the same distance from the reference surface in both parts.

If, on the other hand, you reference the edge slots with the joiner's fence and the face slots with the joiner's base, the slot alignment may be off by a 1/32" or so.

Assuming the cabinet's sides will be exposed — partially or entirely — lay out and bore pockets for assembly screws in the top, bottom and cleats. At this point, you can also band the edges that will be exposed in the assembled box. These include the front edges of the sides, top and bottom, and shelves, as well as one edge on each cleat. This is a good time to apply finish to the exposed edges and faces.

The case parts are ready to assemble. But unless you are prepared to hang the cabinet, there's no reason to do that. Instead, turn to the doors.
Build the Doors
The doors on the cabinet are uncomplicated — hardwood frames assembled with groove-and-stub-tenon joints around 1/4" plywood panels. The panels won’t expand and contract the way solid wood panels do, so they can be glued in place, strengthening the assemblies.
The door dimensions are derived from the case dimensions. The case is 30" square. The doors overlay the case edges with a 1/16" reveal on either side, a 1/4" reveal at the top and 1/8" at the bottom and a 1/8" gap between the doors. Thus each door is 14-7/8" x 28-5/8".
Cup hingesa mount the doors to the case. To install the door, you clip the hinges, which are screwed to the door, to plates screwed to the case. The placement of both the hinges and the plates is critical. The fact that the hinges, being European, are dimensioned in millimeters only seems like a complication. Standardization leads to success.
Each hinge is located by boring a 35mm stopped hole into the door. Buy a 35mm Forstner bit for this job and use a jiga> (or make one yourself) to set the drill press fence to the offset directed in the packaging. Set the tool's depth stop and you are ready to roll. All that remains is to mark the fence 4" to the left and right of the bit axis.
It's standardization. With the drill press set up, you bore two holes in each door. No layout required, and all the doors will be the same.
Assemble the Cabinet

Install the hardware first. Screw the hinge plates to the cabinet sides, and the hinges (keeping them square) to the doors. Attach the door pulls as well.

Now assemble the box. Begin by joining one cleat to the top and another to the bottom. Spread glue, insert biscuits, and join the parts, aligning the ends perfectly flush.

Apply clamps, checking to ensure the faces are square to each other. Drive screws into the pockets to secure the parts, and pull the clamps.

Rest a side across sawhorses, and spread glue and insert biscuits. Set the top and bottom in place.

Spread glue and insert biscuits for the second side, and set it in place.

Apply clamps to seat the joints, and measure the diagonals to check that the cabinet is square. Drive screws in the pockets, then pull off the clamps.

Spread glue in the rabbets and set the back in place. Secure it with staples or screws.

Though the cabinet box is assembled and finished, you ought to allow several hours for the glue to cure before mounting it on the wall. Once it is mounted, clip the doors to the case and set the shelves. You've got a cabinet ready for use. By using these basic steps and assembling "on-site," even home shop heroes like us can make one cabinet or a whole kitchen full.


Keep the inspiration coming!
Subscribe to our newsletter for more woodworking tips and tricks