Build a Continuous-Grain Tapered Box

This gracefully tapered box features grain that runs in a continuous loop around its sides.
While the design of any box project should rest on its own merits, meticulous grain selection always adds an enormous amount of visual appeal to the overall finished look. But when that grain flows smoothly across one face, around the corner and into the adjoining face — and all the way around the box without a break — the grain itself becomes a major part of the design. While a little tricky, getting the grain to flow continuously around a four-sided object isn’t difficult to do by resawing the box components and then carefully arranging them when doing the joinery. With this simple box project, we'll enhance the effect by tapering the box sides, allowing the eye to more easily take in the continuous run of grain at the corners.
STEP 1: Select a piece of stock thick enough to be resawn into two pieces of appropriate thickness for your box. The length of the stock should equal the length of one box side and one box end. Note that for a tapered box like this you could do compound miters at the corners, plus angle the grooves for the box top and bottom, but we'll keep things simple by starting with fairly thick sides and do the tapers with more resawing later in the project.
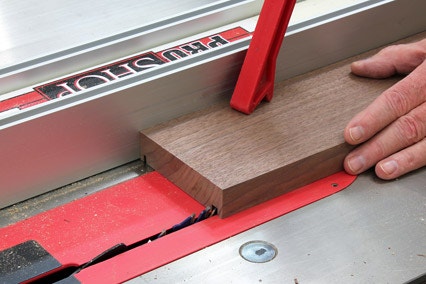
STEP 2: Lay the two resulting pieces end-to-end, keeping the top edges oriented so the grain runs continuously from one piece to the next. Now, cut the grooves for the box top and bottom. For this box a single pass cuts a 1/8" groove for a thin piece of plywood for the bottom, which I'll cover with felt later; multiple passes make a 1/4" groove for a fancier top of redwood burl. You could install a dado cutter to do the 1/4" groove, but resetting the table saw fence and making a couple passes is much faster.
Step 3: With the grooves completed, realign the two pieces on your work surface and run a continuous angled line from one end to the other across both pieces. This line, and numbering the four sides if you wish, will help you keep the workpieces ordered for assembly after further cutting. Cut the box sides in order (either direction — 1 through 4, or 4 through 1 is fine) with 45-degree miters.
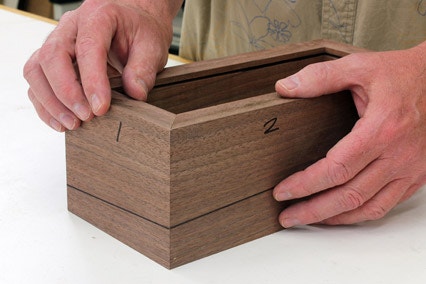
STEP 4: Do a dry-fit of the completed sides to check your mitering. You can see how the grain, as well as your angled line, will continue smoothly around the corners.
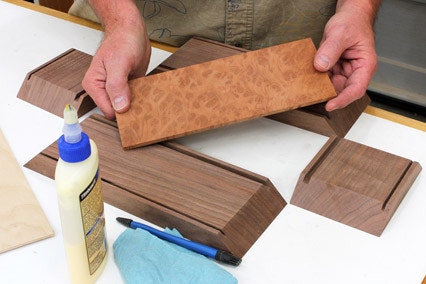
STEP 5: Prepare to assemble the box by allowing the dry-fit to just “collapse” on your worktable such that the sides are still in the correct order. Insert the top and bottom pieces into their respective grooves, apply glue to the miters, and clamp up the box. I used band clamps to hold the box securely as the glue dried, but use whatever method you prefer. The box will be completely closed, of course, but we’ll separate the lid a bit later.

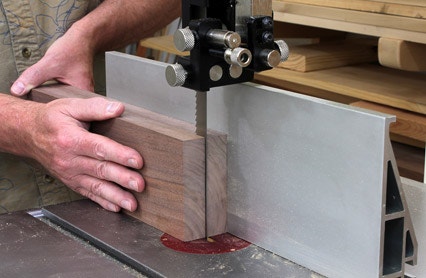
STEP 6: I've designed this box with a 5-degree taper on each of the four sides. To make the tapered cuts — which are really resawing, just as we did earlier — tilt your band saw's table by 5 degrees and lock it in place.

STEP 7: Set your band saw's fence so the blade aligns with the corner tip on the bottom of the inverted box. I've started with the short ends, but it doesn't matter if you start with the short or long sides, as long as you do them in pairs without moving the fence. Power up the saw and run the box through, then flip the box around and do the opposite side. You'll note here that I did all my markings in heavy marker instead of pencil. Since I knew we'd cut the sides off anyway, I preferred the nice dark markings on the walnut I used.

STEP 8: Now, reset the fence to align with the corner tips as before to cut the two remaining sides. Once you've made all four cuts, you’ll find that the grain follows perfectly around the tapered miters.

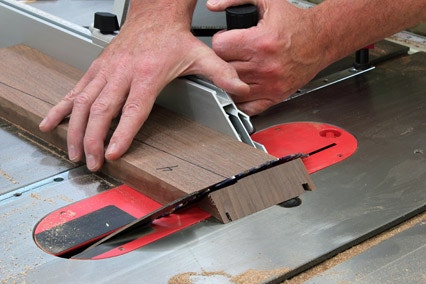
STEP 9: The last step is to separate the lid by simply cutting it free. As a result, the lid will not only have continuous grain around the corners, but also along the box faces from top to bottom. Return your band saw table to level and adjust the fence to create a lid of the size you want, then run the workpiece through with the back of the box against the table. Because this cut registers off the bottom surface it’s also a 5-degree cut, but it will create a lid with a downward-slopping 10-degree angle from absolute vertical, a look that I like a lot. With the main carcass of the box complete, mortise in some hinges on the back, add the final finish of your choice, and line the bottom with a colorful material.


Keep the inspiration coming!
Subscribe to our newsletter for more woodworking tips and tricks