Adjustable Angle-Drilling Jig
Never change the precise 90-degree setting of your drill press table again with this adjustable angle-drilling jig.
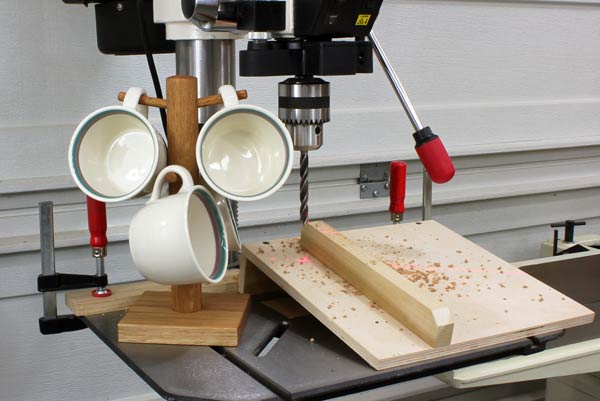
Many shop machines with adjustable-angle tables do most of their work with the table set to achieve 90-degree results. Tools like band saws, disc sanders and drill presses typically have adjustment scales allowing the tables to be tilted for angled work, but those tasks don’t come along that often. I take great care that my tool tables are at a perfect 90 degrees, and once I get them there I'm loath to move them. And while most angled work on the band saw and sander is best done by changing the table, that's not the case with the drill press. For drilling a series of holes all at the same angle, a simple jig made from shop scrap works wonders to get the job done. And once you’ve made the jig, you can adjust it quickly for future angle-drilling tasks — and leave the machine's main table at 90 degrees all the time. That's because instead of angling the table, we'll angle the workpiece itself. To illustrate the process, we'll make a simple hanging mug tree.
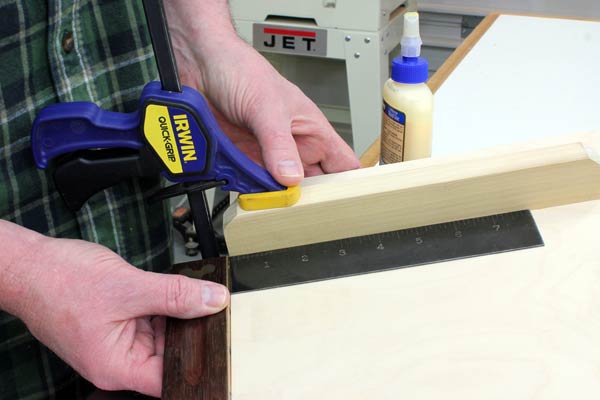
STEP 1: This jig consists of only three parts: a piece of plywood that acts as the tilting table, a brace for the underside, and a fence to align your work. Size your plywood table to suit your needs; the one here measures about 10" x 12". Attach a piece of scrap to the top surface perpendicular to the front edge. The length of this piece isn't critical, but it should run from the front edge of the jig at least up to where the drill press chuck descends. The fence need only be high enough to accommodate the work you're drilling.
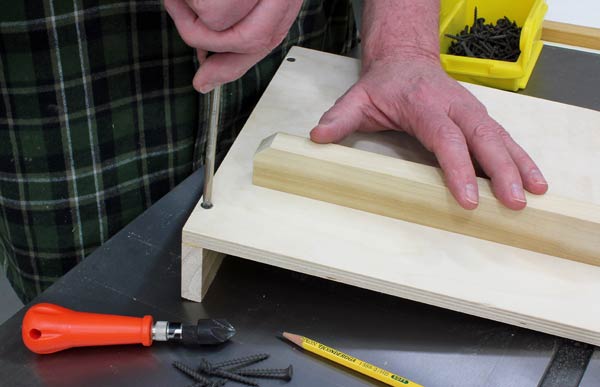
STEP 2: To tilt the jig table, cut a piece of scrap to width such that once in place on the back of the jig, it braces the jig at the desired angle you want to drill. The angle I wanted for my mug tree was about 10 degrees, but cut yours as needed and screw the brace to the back of the jig. If you like, give the jig a light sanding around the edges to eliminate any sharp corners.
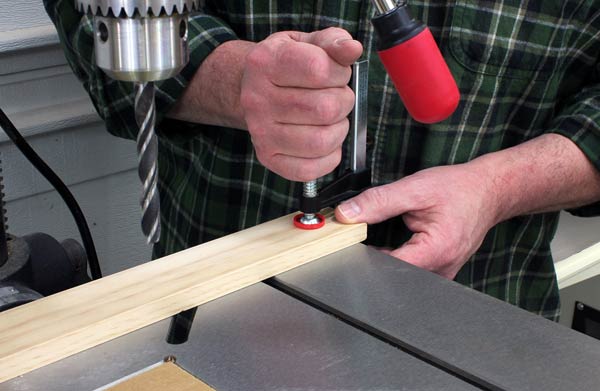
STEP 3: You don't want your jig sliding around on the drill press table, plus you want it to be square to the front of the drill. This is easy to achieve by clamping a table-width stop at the back of the table. Position the stop so the jig will align squarely with the front of the machine, and then clamp it down at the edges of the drill press table.
STEP 4: Place the jig on the drill press table snug against the stop you clamped on at the back, and then place the workpiece up against the jig fence. Again, you don't want things moving while drilling — being round, the dowel used here for the post of the mug tree could roll all over the place — so once you have the workpiece lined up front-to-back with the bit, clamp it against the jig fence. With the workpiece clamped into place, you can move the entire jig side-to-side as a unit. Do this now so the workpiece is just to the side of the drill bit, and then lower the bit to the desired drilling depth. Set and lock the depth stop on your drill press.
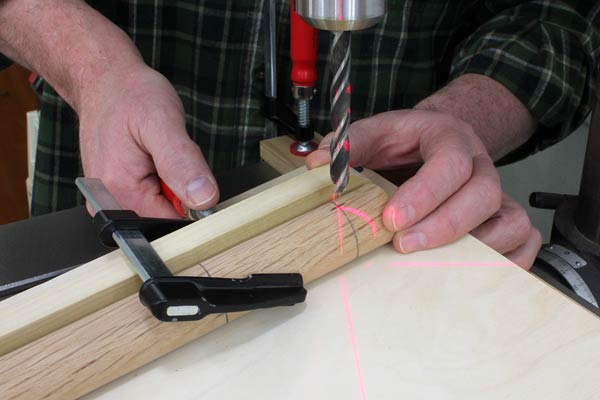
STEP 5: Line up the jig and workpiece beneath the bit and drill the first hole on your mark. Now just unclamp the workpiece, rotate it to the next mark, reclamp and drill each of the remaining holes in turn. Note that while clamping dowels in place for drilling is always a good idea, you may not need to do that for flat or rectangular workpieces. Let the individual project be your guide — if there's a risk of workpiece movement while drilling, clamp it to the jig.

STEP 6: Although the jig shown here was made to drill those 10-degree holes for my mug tree, there's no need to retire it once the job is done. To adjust the jig for higher angles, simply clamp a flat piece of scrap onto the brace to raise the back of the table as needed. I've set my bevel gauge to a new angle, and used it as a guide to clamp a strip of 1/4″-thick plywood to the back. Those little 4" clamps work well to hold that strip in place, but not get in the way of the drill press post.


Keep the inspiration coming!
Subscribe to our newsletter for more woodworking tips and tricks