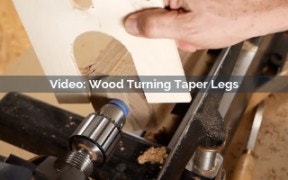
Wood Turning Taper Legs

Woodturning a tapered leg is not difficult. The trick is to turn multiple legs with tapers that match. Learn how to use a couple simple jigs to measure the diameter at each end of a tapered leg and turn consistent tapers.
Skill Builder Video
Wood Turning Taper Legs - Video Transcript
Rob Johnstone: I'm going to glue these legs up in four courses of three pieces of walnut. I'm using Titebond III here because it has a longer open time. The reason why that's important is, I've got three other sets of legs that I need to make, to glue up, and get ready before I can put the clamps on. I need to get a nice, smooth coat of glue which is why I use this spreader. Once I get this spread out, I'm going to put the course together like this. Squeeze it a little bit to get a tack going. Now I move on to the next one.
You might notice that there's a big ugly knot there. That's okay because this leg is going to taper from its full dimension here, down to almost one inch around. All of that wood will be turned away and it'll look great. Now, I'm going to glue up this last leg and put them in the clamps. Now I've got glue on all four sets of legs, and now I'm using clamps to clamp them all up at one time. Flip this over, now put the last set on the other side of the block, and then let the glue cure for several hours.
Now that the legs are glued up and out of the clamps, I've cut them square to length and I've drilled a hole for this threaded insert. This threaded insert will be useful in two ways. First of all, it'll help me mount it on the lathe where I'll turn this to a perfectly tapered leg. Second of all, it will help as I mount it to the cabinet and I'll be able to bolt the leg to the cabinet. Let me use this instant bond glue to help secure it in there and then get to turning.
I got the leg blank mounted on the lathe now. The goal here is to turn the taper that starts at two and seven-eighths of an inch and goes all the way down to one inch. We want four legs that look identical. It'd be great if they were identical but really look identical is where I'm going to aim for. How do I make sure I get that proper taper? This little jig will help me. I'll show you how I use it in a minute, but I'm going to be able to get the two and seven-eighths inch diameter up here and one-inch diameter down here, and then I'm going to connect the dots. Pretty simple really.
Good. Now that I've got this diameter established and this one, now I'm going to take my spindle roughing-out tool and just create a straight taper between the two. Just think of it as connecting the dots.
All right. We got it roughly to size. We've scraped it off smooth. Now some sanding. Get ready for final finish. Three more legs to go.
Keep the inspiration coming!
Subscribe to our newsletter for more woodworking tips and tricks

