How to Install Undermount Drawer Slides
Learn how to install Undermount Drawer Slides. Undermount drawer slides are totally concealed - no clunky metal to detract from the beauty of your wooden drawers. It's easy to install undermount drawer slides using the Rockler JIG IT® Undermount Drilling Guide with Undermount Drawer Slide Jig. This Drilling Guide locates all required holes for mounting the slides to your drawers.
Video: How to Install Undermount Drawer Slides - Video Transcript
Ernie Conover: Kitchen cabinets are opened and shut thousands and thousands of times. Wood slides can wear out. So, for years, kitchen cabinets have been made with metal slides.
Traditionally, they are side-mounted and show, but today most builders use undermount slides which are totally hidden. You can't see them when you open the drawer. When you close the drawer, the slide very efficiently and quietly closes the drawer and keeps it that way.
I'll show you how they go in in a second. This is the bottom drawer for my bar and will be full of whiskey and wine bottles and pop and everything else, so a fair amount of weight. For that reason, I put a center bearer in the middle that will help to take all of that weight. It's like putting a joist in the middle of the drawer. It has a tenon on each end that engages the groove and a groove on each side that this Baltic birch bottom fits into, so it makes for a drawer that can stand a lot of weight.
Also, these Blum slides will take a hundred pounds. There are some differences in mounting slides. You need to put a set of clips in the front of the door which the slides lock into. These allow adjustment of the drawer up and down within the opening. They also allow adjustment side to side. They will also adjust how far in and out the drawer goes. All of this is within reason, but it allows for very easy adjustment of the drawer to be square to the opening.
You have to cut a little notch in the back of the drawer as well. I do this with a back saw, but it could be done with a router table or a circular saw. I find this a very easy way to do this job. Now, I'll simply take a chisel and mallet and remove this waste. For these Blum slides, these notches or windows have to be 35 millimeters wide, which is about an inch and 3/8. Other manufacturers of slides have different measurements for these. You'll have to check it with the type of slide you install. To properly installed clips, it is important to use a jig to drill pilot holes for the screws. This Rockler jig, you put this against the side of the door to do it and just reverse it.
Now, we need to change the drill over to a six-millimeter drill. Then we place this right there like that and come around and drill a little blank hole in it. We'll do the same thing over on this side. There's a little tab here that goes into that hole and locks it into the door. To get your drawer box in and out of your cabinet, you just pull this and it comes right out.
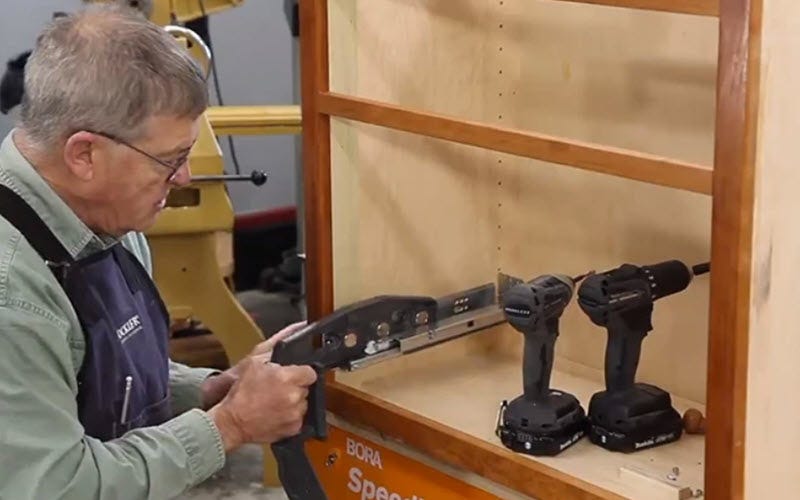
Let's go over to the cabinet box and look at how we install these properly in the cabinet box, so that this drawer fits and comes in and out like greased lighting. I've installed the right slide. It's now time to install the left. This Rockler jig really makes installing these a lot easier. In a face frame box, for most slides you have to put in a shim here at the face that brings this wall out to here to mount that slide on so that it's in the right place.
Most of the slides today use clips on the back. We just put that into this dovetail opening. That will screw to the back wall of the cabinet. For the full inset drawer I'm making, I need to set this back about an inch and 1/32 from the edge. I just put this down like that. I slide it until I'm a little over an inch. That's inch and 1/4. There's inch and 1/32. Make sure that's registered.
Now I just put that against the face of the cabinet, but it needs to be up. There is a mark, I can line up right here. If I line that markup and I have the power to hold that there, I can do that. I find it easier just to pull the shim under the jig to bring it up to the right height so I'm all ready to go. It is, I think, also wise to use a self-centering bit to drill at least your first hole, because you will not move that slide around when you put the screw in.
These bits have a little cone that slides down as you drill. They're often called a Vix bit, a name for the original manufacturer that bit, but I can now just- with this against the frame like that, I can just reach in like that. There we go. Now, I'll just go in the back, drill one more hole. There, let's see how we did. Very nice. Looks good. This will need just a little adjustment right here. With these slides, you can move these in and out about 2.5 millimeters up and down about the same. You move them left and right 2.5 millimeters, so you may have everything come right.


Keep the inspiration coming!
Subscribe to our newsletter for more woodworking tips and tricks