Understanding Oil and Wax Finishes
Many woodworkers turn to oil and wax finishes for their first attempt at finishing, and for good reason. They are easy to apply, give almost foolproof results, require no applicators beyond a rag and leave wood looking both rich and natural. Turners especially love them because they adapt perfectly to finishing wood still turning on the lathe. But how much does it matter whether you use oil or wax? Which oil should you use?
If there is one Achilles' heel these popular finishes suffer from, it is their lack of durability. You would probably not choose a simple oil or wax finish for a bar top or kitchen table that will be assaulted with scratches, hot coffeepots or strong solvents, but they are perfect for bookcases, jewelry boxes, turnings, picture frames, and a host of similar objects. While a wax finish can go on any type of wood, avoid putting oil (or Danish oil) on aromatic cedar or any of the dalbergia woods (rosewood, cocobolo, tulipwood). These woods contain an antioxidant that will prevent the oil from curing.
Wax Finish
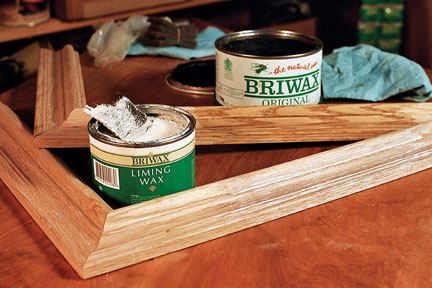
Sold in liquid, paste, and solid stick forms, waxes are formulated in a host of colors. You’ll find them in clear, amber, a range of wood tones and even white. Some waxes are softer, some are harder, but even the hardest waxes are softer than lacquers and varnishes. The fact that they are soft means they offer very little protection against scratches and wear. Waxes are derived from a variety of mineral, vegetable and animal sources. As a finish, waxes don't penetrate wood, but rather sit atop it. They will prevent it from oxidizing (turning gray) but don’t particularly enhance the wood. In other words, once a coat of clear wax dries on the wood, it will look like freshly cut, but unfinished, wood.
Liquid or paste wax typically contains some solvent, and the wax "cures" as the solvent evaporates. Virtually all waxes will dissolve in mineral spirits or naphtha, which is handy to know should you ever need to remove wax, either from wood or on top of a finish. Most waxes melt at very low temperatures, so they don’t offer much in the way of heat resistance. However, they do shed water, which helps them resist food and drink spills. You can apply wax over any other finish and it will give the surface a soft sheen and smooth feel, but don’t put other finishes over wax. To apply liquid or paste wax, simply rub it on and wipe it off. A Scotchbrite™ pad or fine steel wool makes a good applicator; then wipe with paper shop towels. If you wipe the wax off immediately, it will leave a dull sheen as it dries. For more shine, let it dry, then buff it with a soft cloth.
Oil Finish
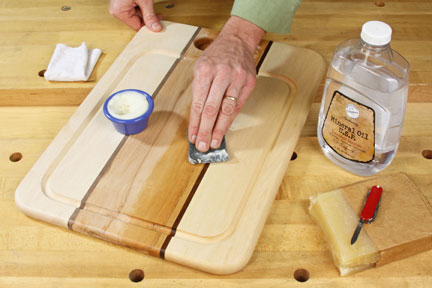
Oil is made of molecules small enough to seep down into the wood rather than merely sit on top. As a result, oil makes wood look richer and more translucent without adding a film on the surface. There are two different types of oils that woodworkers use: drying and non-drying oils. Drying oils will change from liquid to a solid film when exposed to oxygen in the air. Nut oils (boiled linseed, tung, etc.) are drying oils, but vegetable (peanut, olive) and mineral oils are non-drying. Edible mineral oil is popular on food contact items, like cutting boards. However, non-drying oils stay wet indefinitely, and they will wash off when the board is scrubbed with soap and water. Because they do not dry to a solid film, non-drying oils are considered a wood treatment, but not a finish. The most common and least expensive of the drying oils is boiled linseed oil. Tung oil dries a little bit faster than linseed oil, and sometimes it is modified to cure even more quickly.
To apply an oil finish, flood it onto the wood, adding extra to keep the surface wet in areas where the oil is quickly absorbed. After 10 minutes, wipe off everything that has not been absorbed. For a smoother, richer finish, repeat the process, this time sanding the oily wood with fine wet-and-dry sandpaper. This will create a slurry of oil and wood dust, filling tiny pores and leaving the surface even smoother.
Danish Oil Finish Mixes Oil and Poly
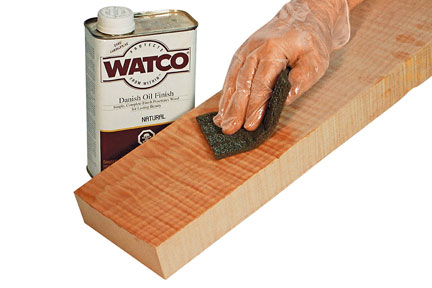
Danish oil, often lumped in as an oil finish, is actually a thin oil and varnish mixture. The oil helps bring out wood’s beauty, while the varnish resin offers somewhat more protection against chemicals, heat, scratches and stains than either oil or wax. Typical of this group is Watco®, both the oldest and best-selling. Many woodworkers create their very first finish using Watco and return to it frequently. It comes in a variety of colors as well as natural (clear). The directions on the can are excellent: Apply it liberally to the wood, let it soak in for 15 minutes, reapply, then wipe off the surface. Use Watco either as a one-coat penetrating finish, or to add as many subsequent coats as you like. Applied no more than one coat per day, you can build up a finish as thick, beautiful, and durable as varnish, with no brushes to clean or brush marks to rub out. The good news is that a multi-coat Watco finish is durable enough for most anything you make, even kitchen cabinets or a dining room table.
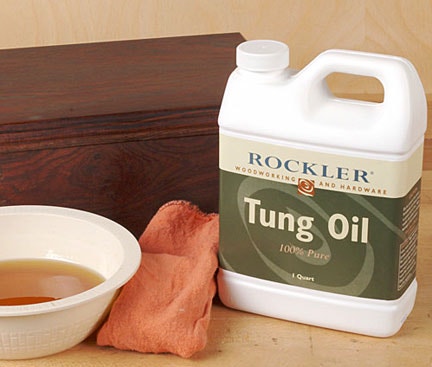
Tung Oil vs. Linseed OilTung oil and linseed oil offer two of the most common options in oil finishes. Both oils provide a gorgeous, deep finish that darkens the wood and protects it.
Using Linseed OilLinseed oil offers more than just great benefits for your skin; it also does wonderful things for wood. Made from flaxseeds, linseed oils used as a wood application deeply penetrate the grain to protect long-term against UV rays, moisture, and other similar issues. It enhances the wood grain, adding to its natural beauty and providing luster. It won’t turn out glossy; instead, it looks like a satin finish.
Choose from raw linseed oil or boiled linseed oil. Most woodworkers use raw linseed oil, created using a cold pressing of flaxseeds. Heating seeds and pressing them results in boiled linseed oil that creates a thicker oil. Either option creates a food-safe finish for cutting boards or other kitchen items.
Wax vs. Linseed OilYour goal with your wood project decides whether you want to use wax or linseed oil. Wax only stops the wood from graying. Linseed oil adds to the wood’s beauty. Wax doesn’t penetrate the wood, but linseed oil does, offering enhanced wood protection.
Let’s move on to considering linseed oil and tung oil.
Using Tung Oils
When considering linseed oil vs. tung oil, two essential differences arise: price and application time. Tung oil also offers a food-safe material for finishing wood since it’s made from tung tree nuts. It beautifies wood and penetrates the grain. This nontoxic oil offers a safe option for children’s furniture and kitchen tables. Tung oil also helps build a water-resistant finish but won’t help smooth the wood. It sounds great, so let’s get back to the disadvantages. Tung oil costs more than other options. It also requires six coats minimum. The woodworker must wait for each application coat to dry before applying the next one. That means that between tung and linseed oil, the latter offers the quicker, cheaper choice with the same benefits.
Tung Oil vs. WaxWhen considering either tung oils or wax, the comparison reads a lot like wax vs linseed. Wax won’t provide the wood enhancement that the oil does. The tung oil offers a richer finish and seeps into the grain to create a glossy sheen.
Tung Oil vs. Danish OilYou might also consider Danish oil for an ongoing project, but that and tung oil create vastly different finishes. A tung oil finish looks glossy, while Danish oil looks flat. It’s the matte finish of woodwork. Danish oil cures much quicker than tung oil, though.
Which Finish Do You Want?
Ultimately, your desired finish decides whether you use raw linseed oil, boiled linseed oil, tung oil, Danish oil, or wax. Wax won’t penetrate the wood to change the finish. Danish oil creates a flat finish. For a satin finish, choose linseed oil, and for a glossy finish, choose tung oil.


Keep the inspiration coming!
Subscribe to our newsletter for more woodworking tips and tricks