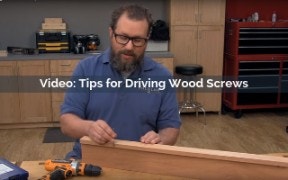
Video: Tips for Driving Wood Screws
Learn how to prevent splitting wood and stripping screw heads. Drilling pilot holes and clearance holes makes it easier to drive wood screws and helps create a strong connection. Use a combination countersink bit to drill both a pilot hole and countersink to recess the head of the screw in the workpiece.
Skillbuilder Video
Tips for Driving Wood Screws - Video Transcript
Speaker: Whether you're a seasoned wood-worker or a newcomer, chances are you've driven some screws. If you've driven screws you've also run into the accompanying problems. You maybe had a part that splits or the two parts that you're screwing together don't come together fully. Maybe the screw head itself strips out or the screw completely breaks. We'll run over some tips today that will help you avoid those problems in the future.
If you're experiencing any of these problems chances are you're just taking the screw and trying to drive it right through the bare wood. The solution is to create a path for the screw before you drive. There are a couple of ways to go about this. The first option applies when you're dealing with soft woods. Here, all you really need is a pilot hole. That's just a hole that's slightly smaller than the diameter of the screw's threads. It gives just enough clearance so that the threads are the only thing biting into the wood, and it allows the screw to pull the two parts together.
Here I'm going to be driving a number eight screw, so I chose a 9/64 diameter drill bit to make the pilot hole. This drill bit allows me to drill the pilot hole and the countersink at the same time. The screw drives easily into the pilot hole, and the countersink allows the screws head to sit flush with or slightly below the surface of the workpiece. Now, if you're working with hardwoods, a simple pilot hole is probably not going to be enough. You're also going to need to drill a clearance hole. A clearance hole is drilled only through the top workpiece. In other words, it's the workpiece that you're going to drive the screw all the way through.
That clearance hole is just slightly larger diameter than the threads of the screw. That allows the screw to pass all the way through and the threads are only biting in the lower workpiece allowing the screw to pull the two parts together. One way to drill these two holes is to start with your smaller diameter drill bit for the pilot hole. For that, you're going to drill all the way through the top piece and into the bottom piece. Then you'll switch to your larger diameter bit for the clearance hole. For that, you'll only drill through the top piece. Let me show you how to do this.
This time, instead of using the combination countersink bit, I'm going to use a dedicated countersink and two straight twist bits. I'm going to start by drilling the countersink. In some situations I drill the countersink after drilling the pilot hole. Next I'm going to drill the pilot hole. Here I'm setting the depth of the drill bit to match the length of the screw. Finally, I drill the clearance hole. I put a piece of tape on the drill bit to mark the depth of the top piece, so I know where to stop, so I don't go too deep. Now, I'm going to drive the screw.
You'll see that because of the countersink the head of the screw sits nice and flush with the surface of the workpiece. Now you've seen how having a pilot hole and a clearance hole really helps to draw the two workpieces together. It also prevents splitting because the screw is no longer acting as a wedge and it prevents stripping the head and breaking the screw because there's just not enough resistance anymore. Next time you're driving screws, remember these tips, pilot holes, clearance holes and countersinks. These are all ways to help you prevent problems and get great results.


Keep the inspiration coming!
Subscribe to our newsletter for more woodworking tips and tricks