Phone Charging Dresser Valet Project Plan
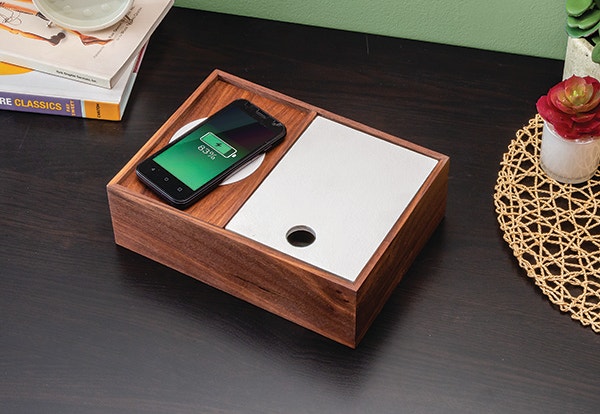
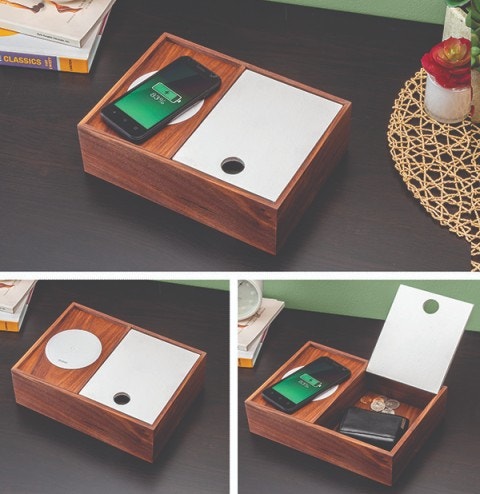
This phone charging dresser valet is the perfect place to charge your phone and store your wallet and keys. Just set your phone over the hot spot and it starts charging. The Zens PuK charging hot spots use the universal Qi wireless charging standard, an induction technology that transmits an electric charge through up to 5mm of wood. The PuK charger can be installed under 5mm of wood for a concealed look. In this case, we left the charger exposed in a through-hole and attached the optional white cover plate. With no exposed wires to fray or tangle, and no charging docks to clutter up your desk, you'll almost look forward to charging your phone. Zens chargers are of the highest quality and performance meeting the needs of furniture/commercial grade use.
Download the Phone Charging Valet Plan
Phone Charger Dresser Valet Plan Instructions
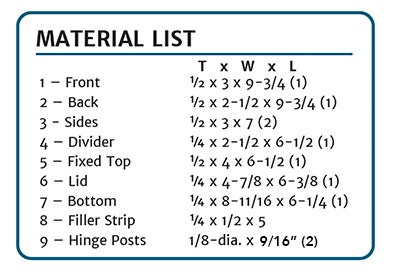
Parts Note: Most of the parts can be cut from the 3"- and 5"-wide pieces of stock. The one exception is the Bottom (7). The bottom is a panel that you must glue up from two pieces of 1/4"-thick stock and then cut to size.

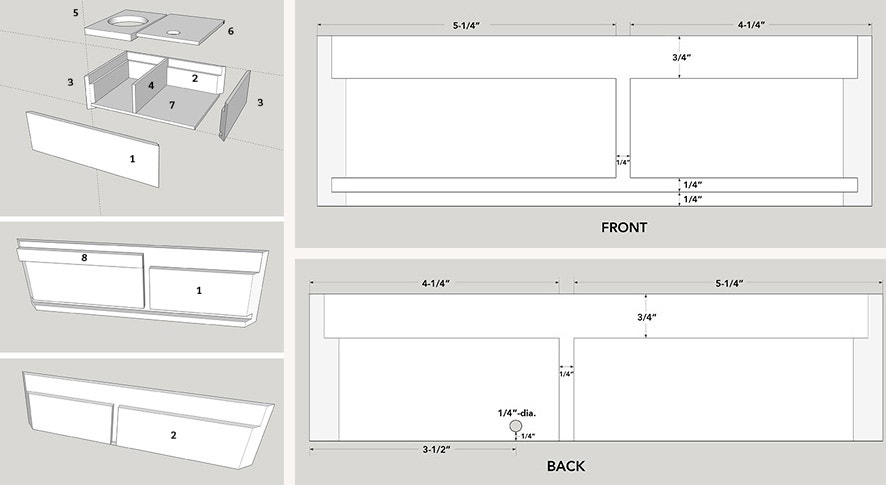
Start with a 1/2" x 3" x 36" piece of walnut. This piece will be the front, back and sides of the Valet box. Set up your router table with a 1/4" straight bit. Set the bit height to 1/4" above the table. Position the fence 1/4" away from the bit. Rout a 1/4"-deep x 1/4"-wide groove spaced 1/4" away from the edge that will be the bottom.
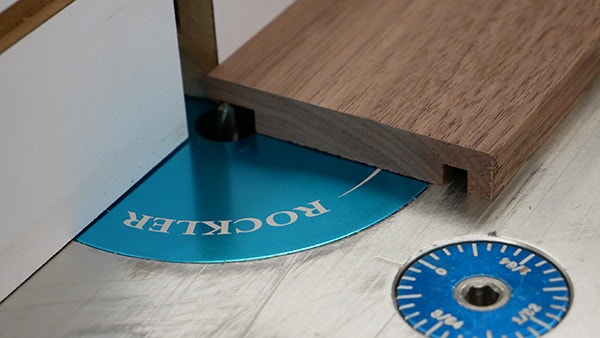
Rout a 1/4"-deep x 3/4"-wide rabbet along the edge of the workpiece that will be the top. You can use the same 1/4" router bit and form this rabbet in three passes, starting with the fence 1/2" from the bit and moving the fence a 1/4" closer with each pass.

Miter cut the front, back and sides to length. Make sure the groove and rabbet are located on the inside face of each piece.

Set the table saw fence 2-1/2" away from the blade. Rip cut the back piece to remove the bottom groove.

Rout the dadoes in the front and back that will capture the divider. Set up your router table with a 1/4" straight bit. Set the bit height to 1/4" above the table. Position the fence 5-1/4" away from the bit. First place the back piece face down with the bottom as the leading edge. Use a backer board to help keep the workpiece square to the fence as you rout the dado in the back.

Place the front piece face down on the router table with the top as the leading edge. Make a mark on the fence 2-1/2" from the back of the bit. This is the stop cut mark. Rout the dado in the front piece, stopping the cut when the leading edge reaches the stop mark.


Cut the Fixed Top and Lid to size. Drill the holes for the hinge pins in the Divider, Right Side and Lid. Drill an 1/8"-dia. x 1/4" deep hole in each piece. Locate the hole in the Divider 9/16" from the back edge and 1n 1/8" from the top edge. Locate the hole in the Right Side 5/16" from the inside edge of the miter. Locate the Lid holes in the side edge of the Lid for the hinge pin. Locate this hole 3/16"" from the back edge of the Lid. Then sand and paint the Lid.

Use a jig saw or scroll saw to cut the 3-3/16" hole for the charger in the Fixed Top.

Lay out the front back and sides with the mating miters lined up. Use painters tape to connect the miters. Apply glue to the miter faces and divider dado. Assemble the Left Side, Front, Back and Divider. Do not connect the Right Side until the Lid and Hinge Pins are in place.

Insert the Hinge Pins in the Lid. The insert the left Hinge Pin in the DIvider and the right Hinge Pin in the Right Side. Secure the corners with tape.

Apply glue to the rabbet shoulders that will support the Fixed Top and install the Fixed Top. Measure across the diagonals and use a clamp to bring the box into square.

Drill a 1/4" hole in the back panel for the charger cord.

Install the charger in the Fixed Top.

Tighten the flange screws to secure the charger in the Fixed Top. Then slide the bottom panel into the bottom grooves in the side panels and front panel.
Keep the inspiration coming!
Subscribe to our newsletter for more woodworking tips and tricks