Video: Make A Simple Circular Saw Cutting Guide
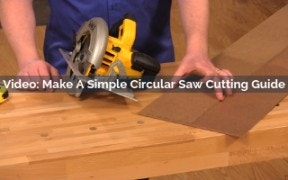
This DIY circular saw cutting guide will help you make straight and accurate cuts with your circular saw. Learn how to make this saw guide. You only need a couple pieces of thin sheet stock to make this guide and it will work with just about any circular saw. You can also make the same type of cutting guide for your jig saw.
Skill Builder Video
Make A Simple Circular Saw Cutting Guide - Video Transcript
Speaker: Cutting plywood with your circular saw is pretty simple. It can actually be safer than using your table saw. To get truly accurate cuts, you're going to need a cutting guide for your saw. Now, there are several nice accessory guide and track saw systems available for you to purchase, but it's also really simple to make your own guide that will work with just about any circular saw. Let me show you how.
This shot made guide is simple as can be. All you need are two strips of thin sheet stock to make it. A wide board for the base and a narrow one for the fence. You could use just about anything sheet stock. In this case, I use tempered hardboard. It's lightweight and easy to cut. It's easiest to rip these strips using a table saw, but I'll show you how to make this guide using just your circular saw, for those of you that might not have a table saw yet.
I like to make the width of the fence strip the same as the distance from the blade to the edge of your saw's base. Now, I've clamped my sheet stock to the workbench so that I can cut the fence strip. Before I do, I'm going to mark the outside factory edge because I know that this edge's straight, and that's going to be important when it's time to assemble the guide. Now, you could draw a cut line and try to follow with the saw, but I find it even easier to place your finger on the side of the saw's base and let it ride along the edge of the sheet stock to guide the saw.
Now, that I've got the fence strip cut, all I have to do is glue it down to the rest of the sheet. I'm going to pay special attention to those marks I made that show me the outside factory edge because that edge is nice and straight. I want to keep that on the inside of the guide. That way, the saw's base will ride along that nice straight edge. All I have to do is apply some glue to the back of this fence. Clamp it. Weight it down with some paint cans and let the glue set.
Now the glue is dried have taken the guide out of the clamps and I've clamped it to the saw horses because all that's left to do before the guide is ready to use is to remove the last bit of excess from the guide. To do that, I'm going to make a rip cut through the guide being careful to keep the saw's base press tightly against this new fence as I make the cut. Now, the guide is ready to use.
When I'm cutting sheet goods, I like to set up on top of a piece of plywood and a piece of foam insulation. This gives me full support and allows me to cut right through the workpiece and into the foam, but you don't need to do that. You could just set up on a workbench or some saw horses. Now, to make our cut with our guide. The first step is to mark where I want the cut. In this case, I'm going to go with 13 inches. Then all I have to do is place the inside edge of this guide right on those cut marks and I'll get a perfect cut.
I'm just going to clamp this to the workpiece and make my cut. The guide is working great. I'm getting perfectly straight cuts right on my marks. There you have it. The simple guide makes it easy to make straight accurate cuts in sheet goods. Today, I showed you how to make this four-foot version, but if you started with a four by eight sheet of hardboard, you could make an eight-foot-long version for making longer cuts and still have enough to make a couple other guides for making shorter cross cuts.


Keep the inspiration coming!
Subscribe to our newsletter for more woodworking tips and tricks