How to Weatherproof Outdoor Furniture
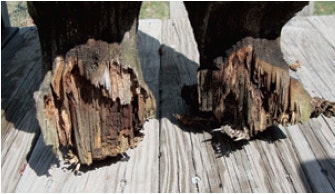
Even well finished projects will eventually change color and begin to show damage. In most cases, when it comes to outdoor woodworking projects, the part that comes in contact with the ground is end grain. While water sheds off the rest of the piece, those end grain surfaces often sit in it, acting like a wick. Porous wood, especially close to the ground, absorbs a great deal of water, which will eventually damage and rot even the best treated wood.
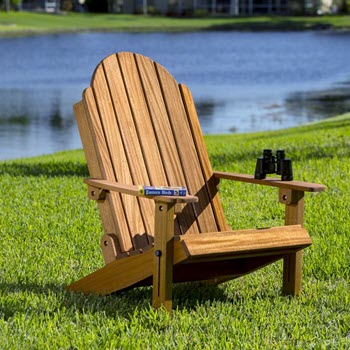
As you probably know, wood is made up of hollow cells that look like a bundle of straws when viewed on end. They will hungrily wick up water when furniture feet stand on wet ground. That can create excess swelling and can contribute to premature rot and cracking. Outdoor wear on furniture can be slowed if it is sealed or built from specially treated wood like this adirondack chair, but even then damage will eventually seep in.
A good finish on the ends or the use of rot-resistant wood will help, but there’s something more you can do, and it’s fairly quick and simple. Before you apply the finish, plug up those end grain areas with exterior epoxy. The epoxy will soak up into the end grain, creating plugs that stop up those straw-like ends, preventing water from wicking up. That, in turn, can extend the life of your table and chair legs. It’s obvious why this technique works on simple furniture with vertical legs, but I also use it on Adirondack chairs. In most designs, the bottom of the angled back legs are cut diagonally across the grain. Although they are a bit less prone to problems than full-on end grain, they can still soak up excess water, and it’s a good precaution to seal them.

Applying a cure of epoxy, especially to the legs and feet of chairs, tables, and other outdoor furniture can effectively fully seal the wood from the environment. Since epoxy is inert when cured, it is compatible under exterior finishes, so seal the ends before finishing. Turn the piece upside down before you apply the finish, and make sure the ends are clean. I like to sand the end grain with coarse 80-grit paper to make certain that I have a clean surface with clearly open end grain.
Choose a slow-curing epoxy, one with a 12-hour cure rather than quick-set “five-minute” epoxy. You don’t want it to set up before it has a chance to soak down into the pores. Mix a batch of epoxy and spread it across the end grain, pushing it into the pores with a popsicle stick or scrap wood stirring stick. The goal is to get it only on and in the end grain and not on the adjacent flat grain surfaces. Give it a minute or two to soak in, then squeegee off the excess so that the end grain is fully packed and just a very thin coat of epoxy skins the surface. Don’t leave it on too thick or it can chip off.
The idea is to impregnate, seal and case harden the end grain rather than apply a surface coating. Let it cure fully, usually overnight, then sand the sides of the legs prior to finishing in order to remove any wayward epoxy. You’ll find that this simple precaution can measurably extend the life of your outdoor projects.


Keep the inspiration coming!
Subscribe to our newsletter for more woodworking tips and tricks