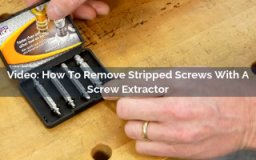
Video: How To Remove Stripped Screws With A Screw Extractor

Removing screws that have a stripped head can be frustrating. There are lots of reasons a screw head can strip, but one of the easiest ways to remove a screw that has a stripped head is to use a screw extractor bit. An extractor bit features two ends. One end looks a little like a short twist drill bit, and it is called the burnisher. The burnisher cuts away some of the stripped original driver profile, leaving a clean surface. The other end is the extractor, which features sharpened threads that are cut in the opposite direction of ordinary screw threads. The extractor end bites into the screw head and turns it when the drill is run in the reverse direction.
Skill Builder Video
How To Remove Stripped Screws With A Screw Extractor - Video Transcript
Chris Marshall: Sooner or later, every woodworker and DIYer ends up in this situation. You've driven the screw into your work-piece and then the driver bit strips it out so you can't drive the screw in any further or back it out. There's all sorts of reasons why this happens. Maybe your pilot hole is too small or you didn't drill a pilot hole at all. Maybe your driver bit is dull or it's the wrong size for the screw you're driving or maybe you're just using low-quality screws like the kind that come in these convenience packs and they're too soft for the woods you're using.
You might have even had trouble with stainless steel or brass screws because the metal is so much softer than standard steel screws. Regardless of the reason for why the screws stripped, we've got a problem on our hands. How to get the old screw out so you can replace it without damaging the wood around it. Well, the answer to the problem is to have a set of extractor bits like these. They're double-ended hardened steel bits and this end of the bit actually looks a little bit like a conventional drill bit. It's called a burnisher.
The other end of the bit has sharpened threads on it that are actually threaded in the opposite direction of a typical screw, so turning it counterclockwise actually threads it in. Removing a stripped screw involves using both ends at the extractor bit. Start by picking the right size extractor bit for the screw you're removing and then chuck it into your drill driver with the burnishing end facing out and switch your drill drivers transmission to reverse. With the drill spinning at a low speed, engage the burnisher in the screw head and grind down about 1/16 of an inch to remove some of the damage driver profile.
Remember to do this with the drill running in reverse. Here you can see that the burnisher has cleaned out most of the Philips driver profile from the bottom and sides of the hole. They're nice and clean. Now flip the driver bit around to the extractor side and keep your drill driver set to reverse just like the burnishing step. Press the extractor tip down against the screw head and very slowly squeeze the trigger. You should feel the bit engaged the screw head and then begin to turn it counterclockwise up and out.
Keep applying pressure to the screw while it turns. That's about all there is to it but the longer the screw or the harder the wood, the more challenging it might be to back the screw out again. If the extractors threads don't want to bite down into the screw head, you may need to switch back to the burnisher and drill down a little bit deeper to clean out even more of that waste or switch to one extractor size larger than the one you use and try that instead.
The occasional stripped screw is just part of woodworking in DIY but it doesn't have to ruin your day. With a set of extractor bits like these, you can fix the problem in a few minutes and be back to work again. They're definitely worth having and storing wherever you keep your drill bits and screws. You can find extractor bits at rockler.com or at Rockler stores nationwide. I'm Chris Marshall with Woodworker's Journal magazine. Thanks for watching.
Keep the inspiration coming!
Subscribe to our newsletter for more woodworking tips and tricks

