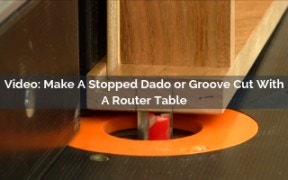
Video: Make A Stopped Dado or Groove Cut With A Router Table

A stopped dado or groove is a cut that does not run all the way through a work piece. Making stopped dado or groove cuts can be tricky because you can't see the bit. The trick is to make marks on the router table to show where the router bit is located and make marks on the work piece to show where to start or stop cutting. A technique called a drop cut is used to start the cut. A drop cut is similar to a plunge cut, but instead of plunging the bit into the work piece, the work piece is lowered onto the bit.
Skill Builder Video
Video: Make A Stopped Dado or Groove Cut With A Router Table - Video Transcript
Speaker: The next time you need to make router cuts or you need to start or stop a cut and you can't see what you're doing, let marks on the router table and marks on your workpiece show you the way. The trick is to put reference marks on the router table that will show you where the bit is even when it's hidden under a workpiece. If you're routing something short or narrow, you can use the fence as that reference. Other times, if you're routing something tall or large, like this drawer, the fence is going to be hidden from view so you'll have to mark the router table instead. That's what I'm going to have to do here.
Start by positioning and locking the fence where you need it. It can help to draw short reference lines on the end of the workpiece and line the fence and bit up directly off of them. Now take a square block of wood, set it up against the fence in one side of the bit, and make sure the edge of this piece of wood just barely touches the bit when you rotate the bit back and forth. Now make a long mark on the table right here and then move the wood over to the other side of the bit and make a second mark. This way, even if your workpiece covers the bit, as long as you can see these two reference marks, you'll know exactly where the bit is located.
You also need to mark your workpiece on the faces, edges or ends, so you know where to start or stop the cuts. I've marked mine right here. It'll be visible throughout the entire router pass. My reference line and my router bit lines will literally touch for best accuracy. Now set the router bit to correct height. The stopped cut I'm going to make for this groove is actually called a drop cut because you lower the wood down onto the spinning bit. It's completely safe to do, so long as you have the workpiece anchored down against the router table and up against the fence. It's a tipping motion, plant the workpiece in back, lower it down into the spinning bit, and then proceed through with the cut. Let's go ahead and make that drop cut now.
There it is. My stopped cut started exactly where I wanted it to because my reference lines made it clear, and this drop cut allowed me to start the cut right here rather than down here, which in this case is what I needed. Thanks for watching.
Keep the inspiration coming!
Subscribe to our newsletter for more woodworking tips and tricks


