Video - How To Make A Sliding Tambour Door
Tambour doors are flexible sliding doors often used on roll top desks, computer desks, entertainment centers breadboxes and kitchen appliance garages. Tambour doors are sold pre-assembled, but you can make them yourself in your home workshop using a router and roundover bit. This video will show you how.
Skillbuilder Video
How To Make A Sliding Tambour Door - Video Transcript
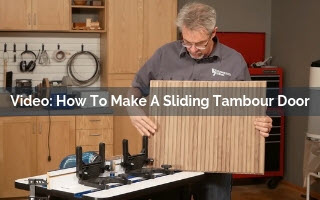
This is a tambour panel. What is a tambour panel? It's a flexible panel made from individual slats that are actually called tambours. Now. they're not that hard to make, especially if you use a tambour router bit set like the one from Rockler Woodworking and Hardware. The cool thing about this set is that it allows you to interlock these individual pieces so that they can't warp or go wonky on you.
After you've assembled all of these things together, then you glue them to a piece of canvas, which allows you to have a very flexible panel, which can be used as a cabinet door or like in a roll-top desk. Like I said, they're not hard to do. Let me show you how we machine these pieces.
Feed the prepared stocks through the first router bit, routing the full depth of cut with one pass. We recommend feather boards to hold the stock securely as you cut. This bit set comes with complete and easy-to-follow instructions. The only deviations from the instructions we made was to machine long strips of walnut and then cut them to link later. The second profile cut is made in the same manner as the first. The last piece of machining that we need to do is to cut a little rabbet out of the face of the tambour.
Tambour panels follow a track or a groove that we routed into the casework. We cut out a little rabbet in the face so that it fits accurately in that groove. We cut it out of the face because then it hides the groove. To make the cut, we set up the table saw with a dado head. We've raised that up so it's cutting the exact correct depth. We've got a little carriage here that we've mounted to the miter gauge that allows us to cut this accurately. We've got a stop here and it allows us to make a super accurate and very controllable cut.
Now, the next step in making a tambour panel is to make a jig that will hold your slats tightly together and keep them square. If you glue them up and they're not square, they won't slide properly in the track. I like to look at the face of the panel. This will be forward-facing, the front of it, so I can align and compose the panel in terms of grain pattern. Once I've got that where I like it, the next thing to do is I have to turn them all over. I'm going to put them end-to-end here and get busy.
Now that I've got all the slats flipped over, I'm going to attach the last piece of the jig, making sure that everything is tight and square. Then I'm going to move on to masking off the panel. Masking tape will keep the glue from where we don't want it. It will also control where the canvas sticks. After we're done and the canvas is glued in place, we can then just flip up the tape and cut the canvas with a razor blade. It's really pretty slick.
Now the fun part. We get to finally apply the canvas to the tambour door. I get all the dust out of there. Once again, we're using hide glue. I bet you've never used this much hide glue in your life. I'm going to roll it onto the canvas. As you can see, it takes a lot of glue to saturate this canvas. We need this canvas to stick to our slats so don't be conservative with it. Now, the cool thing about the hide glue is that if something ever goes wrong with your tambour panel, you can use hot water and just steam that canvas off of the panel and repair it. It's all good to go.
Okay, I think we're getting there. I need a way to control how much hide glue I get onto the wood panel. I don't want to get it too wet because I don't want the glue to go down between the slats and glue the panel together. I just want a nice, wet coat right on the top of the panel. Now to put the canvas onto the onto the tambour panel. I carefully place it down, start to spread it out.
Now, as you know friction causes heat. In this case, the heat will help the hide glue to bond to the panel. It all works very nicely. Removing the excess canvas is not hard at all. Fold the canvas back right where the masking tape ends. Use a sharp knife and trim away the excess canvas.
Now with the canvas attached to the back, you're really going to be able to understand why we form these rabbets on either ends of the tambours. It's going to fit in to this groove right here. Nice. If you have a cabinet in your future, maybe like this console, something like an appliance garage, I hope you see that building tambour doors is not that hard to do.


Keep the inspiration coming!
Subscribe to our newsletter for more woodworking tips and tricks