How To Cut The Four Basic Rabbet Casework Joints With A Table Saw
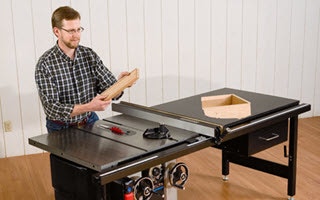
When building casework, cabinetry, drawers, shelving or other box joinery there are four basic rabbet joints you should learn. This post walks you through each of the four joints and shows you how easy they are to cut using your table saw.
Overlap rabbets are made from one large rabbets which is both simple to make and works well with many different types of projects.
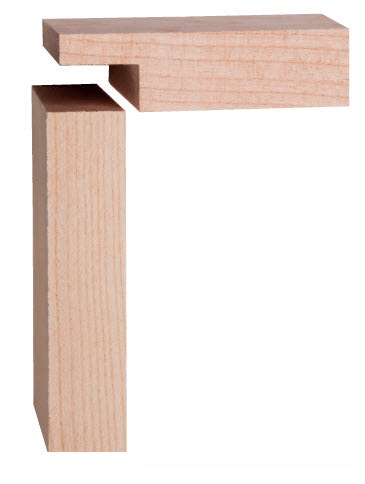
One big rabbet serves many project applications in this overlapping joint. Measure out the thickness of rabbet cuts using the thickness of the mating part, use that thickness to set the distance between the rip fence and the blade. An overlap rabbet joint consists of one rabbet with a tongue that’s long enough to cover the thickness of the mating part. It’s a good choice for assembling drawers when economy is more important than brute strength or high style. Overlap rabbets are the preferred way to conceal back panels in cabinetry, and they offer more surface area for glue than butt joints when building boxes or carcasses of all sorts.
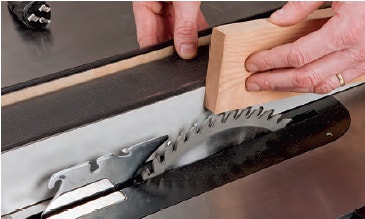
Raise the table saw blade to make the shoulder cut in one pass, pushing it across the rip fence and miter gauge scrap fence. You can cut the rabbet in two passes with a standard blade, as shown here, or tackle it in a single swipe with a dado head.

Be sure to reinforce this cross-grain glue joint with dowels or fasteners driven through the rabbet tongue. Make your second cut to form the cheek and finish off the tongue, a shop made tenoning jig will make this cut easier and more stable.
2. Double Rabbet
Double rabbets combine two overlapping rabbet joints for laying out and assembling furniture carcasses.
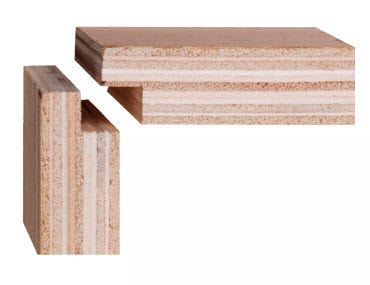
Clamping rabbet sacrificial rip fence Clamp a sacrificial front to your rip fence and bury a wider dado head inside it. Double rabbet joints offer the same self-aligning benefits as overlap rabbets, only this time, both parts are rabbeted to fit together one over the other.

If you don’t own a biscuit joiner or a pocket-screw jig, here’s a good alternative for bringing those cabinet or box carcasses together with fewer headaches.

Make a few test cuts in scrap wood to test the dado blade to establish the proportions you want to cut your rabbet. The stepped design of the joint will keep big panels from shifting out of whack once glue is applied and you’re installing the clamps. Then, lock the parts with brads to strengthen the glue bond and form a mechanical connection.

Use a featherboard to keep the workpieces tight to the table while you're cutting the rabbets, supporting with a miter gauge if need be. The most efficient way to cut double rabbets, especially on larger workpieces, is facedown on the saw table with a dado blade. If you adjust the proportions of the rabbet carefully, so the tongue is exactly half the thickness of the workpiece, one setup takes care of both halves of the joint in short order.

Along with glue, reinforce your double-rabbet joints with pin nails or brads through the side of the joint that won't be visible in the finished project.
3. Shelving Rabbet
Shelving rabbets are a simple rabbet and dado combination, perfect for making plywood shelving.

You can make any size dado cuts you'd like for the shelving as long as the blade is narrower than the plywood, a crosscut sled will aid in making straight, even cuts.

The day will probably never come again where plywood will be a true 3/4" thick, but that doesn’t mean you have to invest in those specialized, undersized plywood bits for your router in order to work with it.

Use the same blades for cutting the dadoes, shape tongue and shoulder for the rabbet using a featherboard and sacrificial fence to set the projection and height. You don’t even have to shim a dado set to match the sheet thickness. Instead, turn to this simple shallow-shouldered rabbet joint and make that funky plywood thickness conform to your will.

Start by cutting the dado side of the joint to the dado width you prefer. Fitting a cut shelving rabbet joint The shelving rabbets will fit together nicely and tight, as good as, if not better than, similar joints cut out by undersized router bits. As long as the blade’s cutting width is narrower than the plywood is thick, you’re all set — 1/2" or 5/8" works well. Then, clamp a sacrificial fence to the rip fence. Adjust the blade’s height and projection to cut the rabbet’s tongue so it matches the dado proportions. Fitting and fastening shelving cut rabbets

These shelving rabbet and dadoes fit tightly enough to use naturally, but fastening them with nails or glue will lend extra strength to the joints. In a couple of test cuts, sneak up on the precise fit. How’s that for taking the hassle out of matching those odd fractions? It’s a thrifty, problem-solving joint that works, no matter what plywood you’re using.
4. Blind Rabbet
Blind cut rabbets are easy to cut in quick succession with a table saw, but they are also impressively strong.

Set your dado blade to cut the blind rabbet exactly half the width of your stock and adjust the rip fence to be the same distance from the blade. Blind rabbet joints use the pairing of a rabbet and dado to the best advantage.

Here, the rabbet’s tongue is cut to fit a dado on the mating part, so the pieces can lock together positively. It’s an ideal joint for building drawer boxes that are covered by a separate drawer face. Test cutting blind rabbet joinery cut.

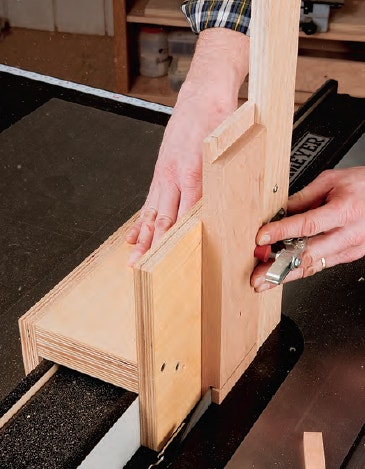
Before committing to the blind rabbet cuts, test it out on scrap with the dado side against a rip fence, being supported by the miter gauge and scrap fence. Or use it to install the back panel on drawers with fancier front corner joinery.

Since the dado completely surrounds the rabbet, there’s ample surface area for glue, so no need to add extra fasteners for reinforcement. Finish off the blind rabbet by using a simple T-jig along the top of the fence, without changing the blade or fence. Blind rabbets are as efficient to build as they are sturdy. You can bang them out “production style” with a single dado-blade setup if the thicknesses of the parts match. But be careful: your blade and fence settings must be spot on for these parts to slip together as they should. Even the slightest discrepancy in saw settings will produce a mismatched joint.


Keep the inspiration coming!
Subscribe to our newsletter for more woodworking tips and tricks