Video: How To Cut Cross Lap Joints
When you need to cut multiple cross lap joints with uniform spacing, reach for the Rockler Cross Lap Jig. Screw it to your miter gauge and use it with your table saw and a dado stack to cut the half-lap joints for anything with a wooden grid: lattice, wine racks, grilles/mullions for glass doors, and torsion boxes for your workbenches and table tops.
Skill Builder Video
Video: How To Cut Cross Lap Joints - Video Transcript
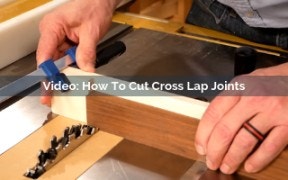
Speaker: This coffee table was inspired by the classic George Nelson design. Key to this project, your half lap joints, also called cross lap joints. What are they? That's when you cut halfway through the width of the piece of wood on both pieces of wood the same thickness of your piece of wood, and they slide together into a super solid joint. Making a cross lap joint is pretty easy. You can do it with a standard miter gauge on a regular old table saw blade. If you're doing multiple cuts and big ones using a dado head a cross lap jig is the way to be more accurate and make the job a lot easier.
This cross lap jig from Rockler is a great one. It's got adjustable keys here, so you can adjust the index to the width of your cut or the width of the material. It's also got an adjustable fence so you can adjust the spacing of each cut. As you can see, I've used this thing a bunch of times. It's really easy to use and highly accurate. Let me show you how I go about making cross lap joints. The first thing I do is install a dado head, and I carefully adjust the thickness of this cutting head so it's identical to the thickness of the wood that I'll be using. Then, I like to use a zero-clearance insert this case because it reduces tear out. It's just a MDF insert. I put the jig here, so that as I lift it up through it doesn't get away from me. I like to raise the blade just a little bit higher than I think I will need it in the actual setup.
The next critical dimension is setting the cut to half the width of my inch and three-quarter inch slat. That's seven eighths of an inch. I'm going to use this little combo square to get that dialed in perfectly. Now, to test the setup, I'm using some stock that came from the actual project that I'm making. I'm going to make two cuts, put them together and make certain that my setup is dead-on. I'm happy with the width of the cut and how they fit together, so I don't need to adjust the dado blade. If I did, I would either need to take a shim out or maybe add a shim in, in order to make them slide together properly.
However, when I adjusted to the seven eighth inch depth of cut, I must have messed up somehow because this top slat is standing a little bit proud of this bottom slat. I'm going to need to raise that cut up just a hair in order so that these two levels are perfectly aligned. Now, if I cut too far and this one was high, I would have need to lower the cut just a little bit. Remember, every move you make is doubled in actual dimension, so make tiny adjustments.
Now I've moved down to using the actual lumber that I'll use to make up the table top. Now, I cut it a little long because as I'm putting these sequenced of cross lap joints in, I want to just be able to trim it to link it accurately that way. You'll also notice that there's a Watco oil finish on here. That makes finishing the top a lot easier once I have it assembled and glued together. It also makes glue up a lot easier to clean up. Now, with every single slat, the first joint is a notch right on the end. In this case, I've decided to use my regular miter gauge sacrificial fence with a stop block right here. It aligns it perfectly. I'll cut all of those pieces and then I'll move back to the regular cross lap jig. I need to get busy now.
Now, I'm ready to move on to cutting the rest of the cross laps. To do that, first thing we do is setup this indexing key to match exactly the width of the cut. Then we move on to adjust the spacing. This has to be eight and a half inches and really close for the rest of the cuts. Ready to go. Now that I got set up, I start cutting. I just move each piece over to the indexing key until I'm done with each slat.
Now it's time to start cutting the cross laps in the short slats. Now, the spacing for that is three-quarters of an inch, basically the thickness of the material we're using. I'm going to just actually use the stock that I have in order to set this up. There we go, ready to cut the cross lap. Now it's time to assemble the tabletop. We're going to engage the cross lap joints here and we're going to do that with glue, assemble it and clamp it up.


Keep the inspiration coming!
Subscribe to our newsletter for more woodworking tips and tricks