Video: How To Apply Wood Veneer
Learn how to attach wood veneer to a plywood substrate. Veneer is a thin piece of solid wood. Plywood is most commonly used as the substrate because it is dimensionally stable, meaning that it does not expand and contract much with changes in temperature or humidity. Veneer is attached to the substrate with wood glue.
Skill Builder Video
Video: How To Apply Wood Veneer - Video Transcript
Rob Johnstone: If you've been around woodworking for any length of time you've heard the term 'veneer' or 'veneering'. Now, veneer is just a super thin piece of solid wood. You often see it in fancy pieces of furniture where they've glued expensive grain woods, exotics to make it look like solid woodworking, but it's really just a thin piece of veneer. Now, veneer is made by single slices or leafs coming off a log or board. It's often sold in flinches, which are those sequential pieces of veneer, which allow you to control the grain pattern for things like book matching. Some people think that veneering is really tricky, but in fact, it's just woodworking.
I'm going to show you how, on a sample piece, a practice piece, how to go through the basics of veneering. I think you'll be really interested. I hope you'll want to give it a try later. All veneering is simply gluing a piece of veneer onto a core or a substrate sometimes called a grounding. Plywood and MDF work best because they're dimensionally stable. Now, you can't put a veneer on solid wood. If you think about it, solid wood expands and contracts with the season. If it expands and contracts differently than the veneer, it can have problems. We're going to try veneering a piece of plywood. Let me show you how it's done.
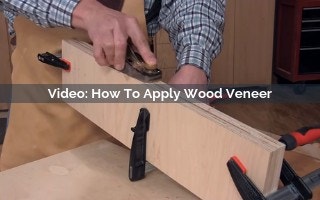
Now, got your substrate cut to size. You need to cut your veneer to length. Now, some people like to cut it over long, some people like to cut it just undersized. The reason that both of those techniques work is your substrate needs to be larger than the final size of the panel that you're going to use so that you cut it to size after the veneer is securely attached. Now, to do that, to cut it to length, I need to find the length that I need and mark it off and then put my straightedge on. I'm going to use a veneer saw to cut this up. Veneer saws have tiny little teeth, very fine and they allow you to cut your veneer without it ripping or tearing. Nice.
It's going to take two pieces of veneer to cover our substrate, which means there will be a seam. We don't want that seam to show. How do we make sure that the seam is tight? Well, we have to trim it so that they're two perfectly straight edges. Before we do that, decide how you want your veneer to look best. I already did that. I want these edges to be the ones that will be joined. Now, I'm going to fold it up so both of those edges are together and I can straighten them at one time. I'm going to do that by sticking the two pieces of veneer into a sandwich between two perfectly straight pieces of plywood. Then I'm going to plane it. Let me show you how I get that done.
Now, those two edges of the veneer just barely sticking past the clamp together plywood, which are dead straight. Now, I'm going to use a block plane to just carefully and I will have two perfectly straight joinable edges and it's just that simple. Now, the traditional way to tape or join veneer together is with this water-activated veneer tape. It's been used forever and once you get skilled at it, that might be your choice. If this is your first time and frankly, for me, every time because this is easier, I just use blue masking tape, start off by securing the ends. The seam fits together perfectly by the way. Get them taped together. There's one. I like to go to the middle. There's two. Now, the other end. Then, now that you get this all perfectly aligned, one long strip down the center and you're ready for the next step.
Now, something that a lot of people do, but not everybody is putting a bead of glue roller. You can use white glue, you can use yellow glue. Titebond makes a great glue that's called Cold Press Veneer Glue and the advantage that that has is it doesn't strikethrough as much. Strikethrough means the glue going through the veneer and showing up as a glue spot. It's important that you get a nice good coat on here because you're not going to put any glue on the veneer. You're just going to flip-- I'm just going to flip this over and put it right on top of the veneer.
Now, I'm going to start to move this side. Now, I'm applying glue to the second face of the core. I get a nice full coat on there, which I've already got. Now, I put the next piece of veneer on. It's important to line everything up carefully. Keep things square so that you're ready to clamp the wax side of the platen it goes down, it gets aligned, a call. Now, we're ready to start clamping. All right. Spin the piece, put the battens underneath sticking out a little bit from the edge, all four of them. Locate them better as I'm going to be clamping. Pull this edge out a little bit. Is everything aligned? It is. Now, hopefully, I can get this clamped. Obviously, I need to repeat this clamp up for all four sets of battens.
Okay. Now for the big reveal, this has been clamped up for 24 hours. It's important to keep it clamped up for a long time because as you might guess, it's hard for things to dry squeezed into a sandwich like this. I'll see how it worked out. That's pretty good. This is really nice. I peeled off the blue tape, checked out the seam, it is tight as can be. The veneer is laying flat, looks just like a solid piece of wood.
Then the final step in this process is I trimmed the panel to size, it's ready to go. This veneer will still be laying here a hundred years from now just flat as can be. That's the tried-and-true traditional way of laying up veneer. It's not that hard. I encourage you to try it anytime you decide to use some veneering. There is a more simple way to do it and that's its advantage, it's easier and takes less time. Let me show you what I'm talking about.
This is real veneer but it's got an adhesive spray it on the back of it which is covered with this piece of paper. You can peel that off, then you stick it down on a panel, secure it with a j-roller and you've got a real veneer on the panel. Now obviously this adhesive is not as powerful as the glue that we used on a traditional panel and so it has some limitations. It's best used within the context of something like a frame and panel where that panel that you're putting this onto is captured by like a door frame or a chest frame, something like that. In that case, it's a great solution.
Veneering offers you a lot of versatility in your work. You can use different species than you ordinarily would, expensive species that become cheaper because you're just buying a flitch of veneer. It also allows you to use really interesting grain patterns and then that sort of thing. Think of that the next time you're making something that has a captured panel or a tabletop or something like that, maybe in veneering is just right for you. I'm Rob Johnstone from Woodworkers Journal. Keep on making sawdust.


Keep the inspiration coming!
Subscribe to our newsletter for more woodworking tips and tricks