Video: How To Align Your Table Saw Blade
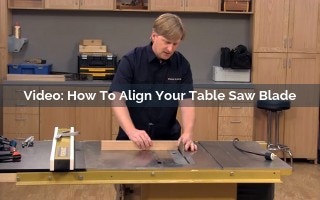
Setting up your table saw blade to be parallel with the miter slot will make cutting smoother and easier, will help prevent burn marks, and will help reduce the chance of kick back. Learn how to check your table saw blade alignment with the miter slot and how to make corrections.
Skill Builder Video
Video: How To Align Your Table Saw Blade - Video Transcript
Speaker: Hi, if you recently purchased a new or a used table saw, or you moved the table saw you have from one location to another location, one of the first things you're going to want to do before you make any cuts is make sure the table saw blade is perfectly aligned with the miter slots. The reason for that is if the blade is out of the alignment, it can cause excess friction and resistance, which can make it more difficult to push the workpiece through. It can lead to burn marks, and worse yet, it could lead to dangerous kickback. If you're experiencing any of those problems, you need to check your blade's alignment.
Let's start by taking a look at the parts we're working on. Now, the table saw blade and motor are mounted to a couple of brackets called the trunnions. This trunnion assembly, depending on the saw you're using, is either mounted to the saw's base, or to the underside of the table. During manufacturing or transportation, this assembly can get bumped or jarred slightly out of alignment, and that can cause problems. Now, this misalignment isn't the kind of thing we can necessarily see. You're really going to need to measure it to determine if the saw is out of alignment.
There are a number of ways that we can test this alignment, but in general, we're basically going to be measuring the distance between the front of the blade and the miter slot, and comparing it to the distance between the back of the blade and the miter slot. If those two are equal, then we know that two are parallel. Now, before we do any of these methods, number one, you're going to want to make sure your table saw is unplugged, and we're going to raise the blade to its full height and check that it is perfectly perpendicular to the table.
Now, there are a number of different ways to take this measurement from front to back. I've seen several jigs and different measuring tools you can use. A lot of woodworkers like to use a dial indicator, which is extremely accurate, but you can also get accurate measurements for this using tools that you have around your shop. The first method I'm going to show you, all you need is an accurate combination square. What I'm going to do is place the combination square in the miter slot so it's pressed tight against the side that's closer to the blade. Then I will slide this up so that it is lined up with the front of the blade and extend the ruler so that it just touches one of the teeth on the blade.
You can tell that as I move the blade back and forth, I can just hear the tooth rubbing against the blade. I'm going to mark that tooth so that I can measure against the same tooth, and I'm going to rotate the blade around so that tooth is now in the back of the blade. I can see that the distance back here is shorter than the distance was in the front. Another option if, say, you don't have an accurate combination square, is to take a scrap of wood and drive a small screw into the end, and then you're going to simply mount that scrap of wood on your miter gauge. Extend the piece out so that the screw just touches the blade. Then you're going to secure it to your miter gauge, mark the tooth, and then just repeat the process just as you did with the combination square.
What we've learned is that the backside of the blade is closer to the miter slot than the front side. That can lead to the blade pinching the workpiece, which can actually then lead to dangerous kickback. It's a good thing we found this out and now we can adjust the alignment of the blade. Depending on the saw you have, the way you adjust the blade will vary, so you're going to want to refer to your saw's owner's manual. In general, contractor saws, job site saws, hybrid saws, typically, the trunnions are mounted to the underside of the table, and so you're going to be making the adjustment against the table that way.
This is a cabinet saw and the trunnions are actually mounted to the cabinet. All we need to do with this saw is loosen up the table's connection to the base and adjust the table to square it up with the blade. Now, this table is secured to the base with four bolts, one in each corner. We know that the distance from the blade to the miter slot is less in the back than it is in the front. We need to shift this end of the table slightly that way to create more distance at the back of the blade. The way we're going to do that is by loosening the three bolts in these corners and leaving this back corner tight to act as a pivot.
I'm going to tap that front corner of the table and it's going to just slightly shift the table into alignment. At that point, we'll remeasure and we'll continue to do that until we've got both distances equal. I slightly loosen three of the bolts that hold the table onto the cabinet. There, that's the last bolt. Now that they're loose, we're ready to tap the table into alignment. I'm going to take this deadblow hammer and just give the front corner a couple of taps, and now we'll go back to the combination square and check the distance at the front and the back of the blade. We'll continue to tap and test until these two distances are equal. At that point, the blade is in perfect alignment with the miter slots.
Once you've got the blade aligned with the miter slots, you really shouldn't need to check it again unless you move the saw or do some work on the saw, or there's an impact, something that might throw the blade back out of alignment. Now that the blade is in proper alignment with the miter slots, your next step should be to take a look at the fence and check to be sure it is properly aligned with the blade and the miter slot, but we'll save that for another lesson.


Keep the inspiration coming!
Subscribe to our newsletter for more woodworking tips and tricks