How to Cut Perfect Miter Joints?
I have an old table saw. I've added a Vega rip fence and an Incra miter gauge to it. I'm very happy with the saw and both the fence and miter gauge. However, I frequently cut miters for frames, boxes, etc., and I want the miters to be perfect. I want the 45-degree mark to be 45 exactly. I have tried to adjust the "0" on the miter gauge numerous times, but I find that when I make an entire frame (all four corners), it's just not quite perfect. I've tried squaring the miter gauge fence with the saw blade. I’ve been careful to make sure the square is not resting on the teeth. I've rotated the blade to various positions to recheck the square. I've even clamped the square to the blade and the miter fence so it can’t move while I tighten it down. But I just can't seem to get it exact. The result is that I frequently have a small gap in the last miter joint. Any suggestions? – Willard Lautner
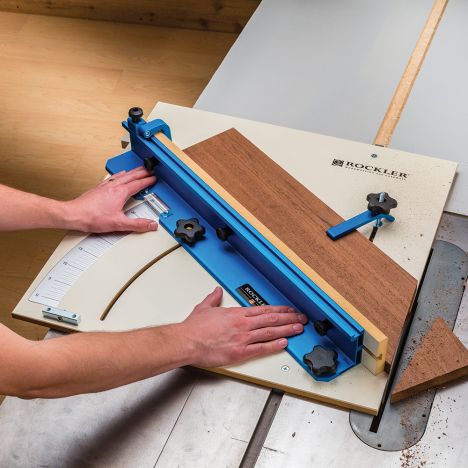
Tim Inman: Build yourself a miter sled. There are lots of plans out there for you to use as guides. Essentially, a miter sled is a board that is built to fit your saw table top. Two hardwood slides are fitted onto the bottom that ride in the miter grooves cut into the saw table. Then, two angle fences are mounted to the top of the sled board. They can be set exactly at the correct angles for your corner needs. On mine, I try having each side set at exactly 45 degrees to the blade. But for sure, I have a true exact 90 degrees between them. I usually run both sides of the miter joint a second pass and cut them together at the same time to give me a perfect joint. With a sled, you just hang it up when you’re finished using it, and the angles and setup are there for you again next time you want to cut perfect corners. Wax the slides, and the sled will slip like it's riding on butter across your table.
Here is a setup tip that might help you: Let geometry and a straightedge be your friends. Two 45's add up to one 90, and so it might make sense to use a square to measure that angle. I think a better way, and the way I use myself, is to make two test 45's on a board. Then, instead of joining them into a 90 to test, I flip one of the boards over and line the two up against a straightedge. You should have a perfectly straight edge, and the joints on the miters should fit perfectly, too. If the joints are open either on the toe or the heel, then you know you need to do a little fine-tuning. Test your sled's 90-degree alignment to the blade by cutting a 90 on a board with your sled. Then, using a straightedge, flip one of the boards over and line it up. The edges should be exactly straight, and the two joints should fit perfectly. If the joint is open on the front or back, then you have some fine-tuning to do. This is much easier and much more accurate than using angle-measuring tools, which carry with them their own errors.
Rob Johnstone: Perfect miter joints are just plain hard to do. They are so simple in concept and so finicky in practice. Part of the problem has to do with basic math. Any tiny fraction of a degree you might be off on your setup will be multiplied by eight ... for every cut in the mitering process. Even so, this is not an impossible task. Here is how I approach it.
Rather than using a miter gauge on my saw, I use a crosscut sled. On my sled, I have inscribed a line where my saw truly cuts at exactly 45 degrees. I determined this by using MDF test pieces cut into strips where the long edges were perfectly parallel to each other. Using those blanks, I made a bunch of test cuts, adjusting the angle until I had a true 45-degree cut. With that marked, I know that I'll be super close with my setup. But even with that done, pieces of solid wood in, say, a picture frame, can still distort out of straightness. To accommodate that possibility, here is how I proceed: When I am making my mitered frame, I miter the first three pieces and lay them on a flat surface. Next, I cut the last piece slightly overlong. After cutting the first angle on that piece, I trim the last miter to fit perfectly by "sneaking up" on it. I hope this is helpful.
Keep the inspiration coming!
Subscribe to our newsletter for more woodworking tips and tricks


