Cutting Mortises with a Drill Press
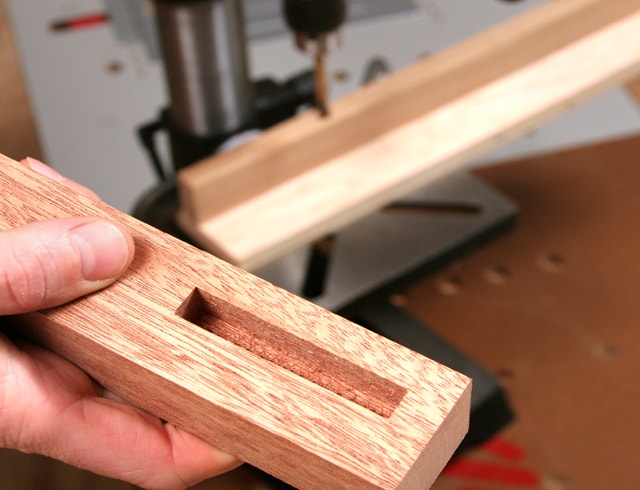
There are several ways that you can create a mortise. A dedicated mortising machine works very well and a router and mortising jig is fast. But, using a drill press to remove most of the waste and then cleaning it up with a chisel is a quieter method that lets you see exactly what you’re doing every step of the way. And, even a small drill press will do the job nicely.
So, chuck a sharp Forstner bit in your drill press, and let’s make a mortise!
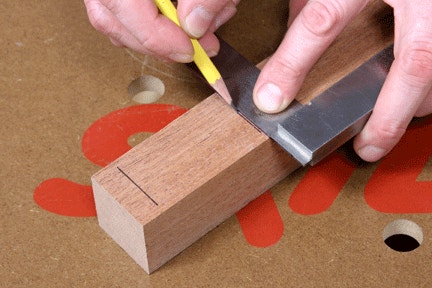
STEP 1 - Start laying out the mortise by drawing lines that establish its length. As you locate these lines, don’t forget to account for the short shoulders you’ll probably want to have on the ends of the tenon that fits this mortise. (Draw the joint on paper first so you’re clear about its proportions and sizing.)
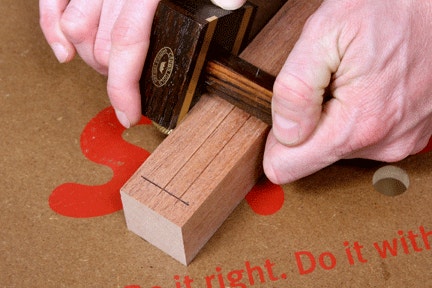
STEP 2 - Mark layout lines to locate the mortise’s long side walls. You can draw these with a combination square and a pencil, but a mortising gauge is much better suited for the job. It allows you to set both the width of the mortise and its location in one step. The gauge has a pair of sharp pins on the tool bar that adjust back and forth to set the width of the mortise precisely. Then, slide and lock the fence to dial in the mortise’s position. Knife the lines by dragging the pins along the wood, keeping the fence pressed tightly against the workpiece.
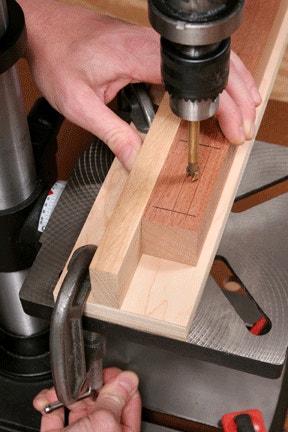
STEP 3 - You’ll need to clamp a fence to your drill press table to back up the workpiece for drilling. If your machine’s table is large, this may be all you need. However, a simple jig like the one shown will help you support a long face frame stile or table leg if you’re using a benchtop drill press with a tiny table. It’s simply two long pieces of straight scrap attached with brad nails. Adjust and clamp the fence or mortising jig so the Forstner bit is centered on the mortise layout.
STEP 4 - Mark a line on the end of the workpiece to set the depth of the mortise. Adjust your drill press depth stop so the bit will meet this line. While you’re at it, set your drill press for a medium to low speed so the bit can clear large wood chips efficiently.
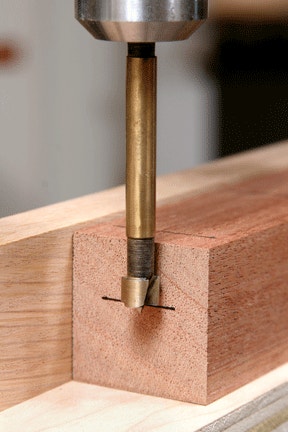
STEP 5 - Bore a hole at each end of the mortise first. Line up the bit so it just touches the end layout lines.

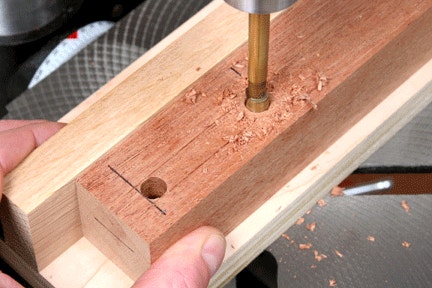
STEP 6 - Drill out the intermediate waste, starting with a series of holes spaced about a bit’s diameter apart. If you drill these holes so they overlap, Forstner bits will tend to wander from one hole into the next and leave a ragged or even crooked cut.

STEP 7 - Now hog out the pockets of waste that remain between the staggered holes. Center the bit on these waste areas to keep it tracking straight and true.

STEP 8 - What’s left for waste amounts to tiny crescents along the mortise. Drill these away. Since the bit’s centerpoint no longer has an “anchor” to guide it, drill out the crescents slowly and carefully. Hold or clamp the workpiece tightly against the fence to keep the bit from wandering off the waste and into a hole. Once the crescents are removed, lower the bit into the mortise a little at a time and slide the workpiece slowly back and forth to flatten the walls further.

STEP 9 - Switch to a wide chisel to shave the mortise walls smooth. Chisel carefully to your layout lines.

STEP 10 - Finally, square up the ends of the mortise with a sharp chisel that matches the mortise’s width (see Photo 10). Tap the chisel straight down, then lever it forward to break away the end waste. Now you’ve got a clean, straight and uniform mortise that’s ready for a tenon.


Keep the inspiration coming!
Subscribe to our newsletter for more woodworking tips and tricks