How to Make a Geometric Pattern Cutting Board
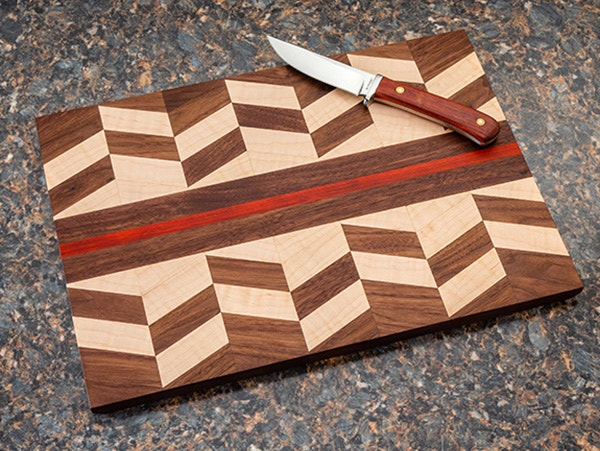
In this Rockler demo, we’ll share a few tricks and tools that make it easier than you might think to make a geometric pattern cutting board. It’s a handy project for using up scrap pieces, you can make more than one at the same time and it makes a great gift. It features lots of small pieces that create a geometric pattern. At first glance you might think it would be complicated to glue all the pieces and keep the intersecting corners aligned. But with an accurate miter gauge and a simple trick for making the patterns, this complicated-looking cutting board is not so complicated.
We show you one version of this type of cutting board (dimensions below), but you can change the pattern and wood species to create endless variations of this type of cutting board.
WATCH: Tips for making a cutting board with a geometric pattern.
Geometric Cutting Board Dimensions
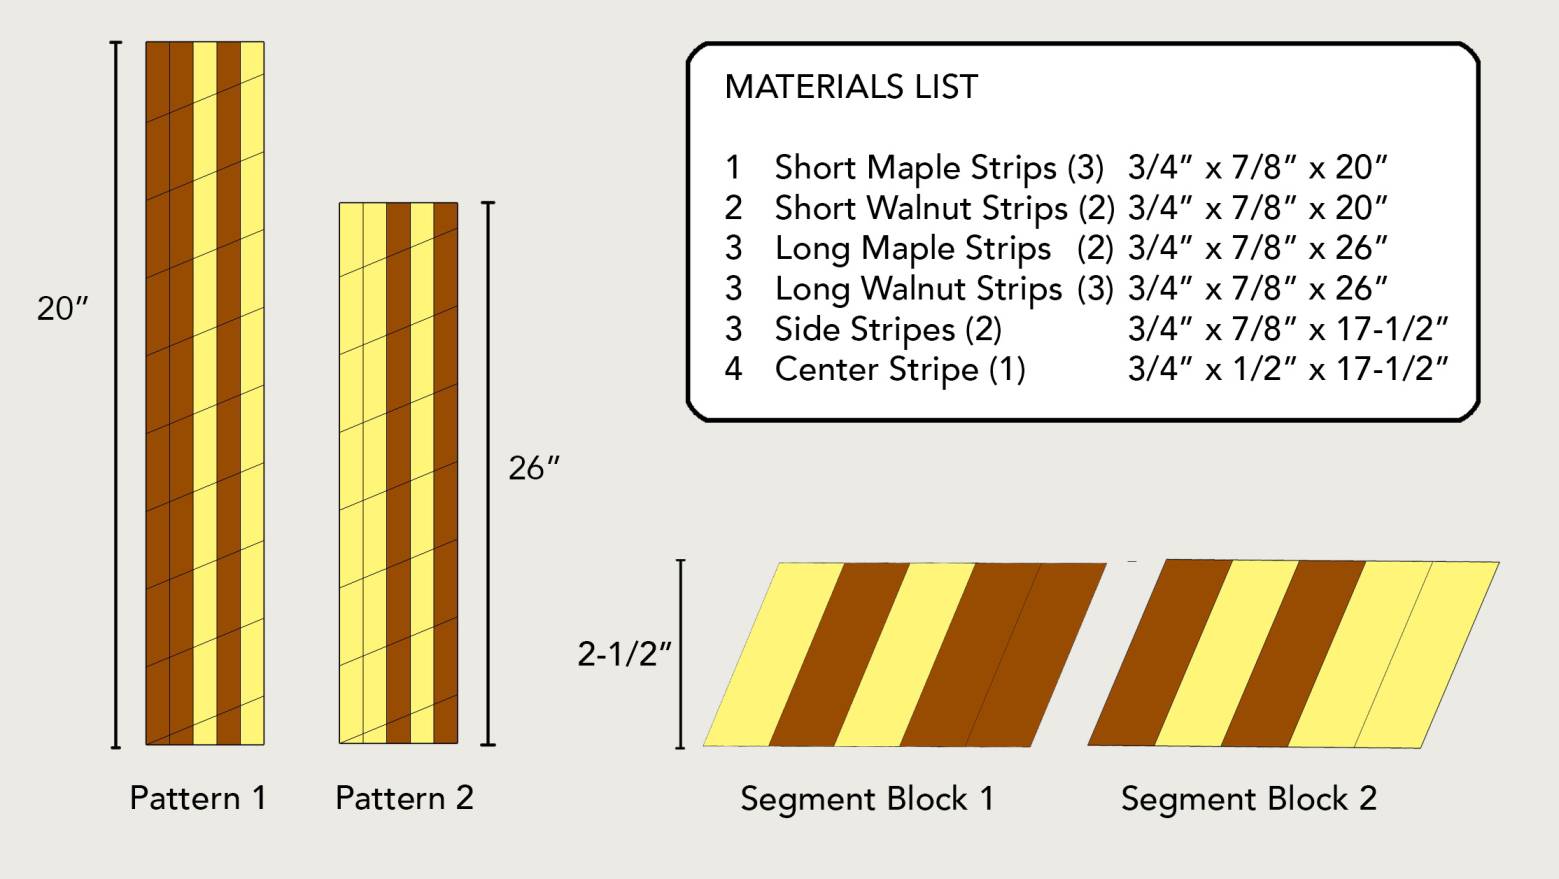
Two different patterns are glued up using 7/8"-wide strips of maple and walnut. Those two pattern blanks are then mite-cut into 14 segment blocks that form the diamond patterned sides of the cutting board.
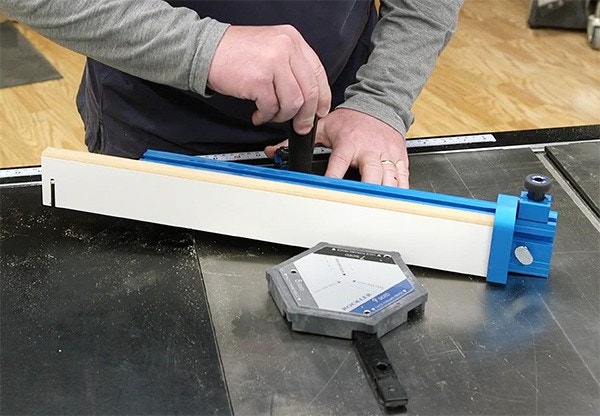
We used the Rockler Perfect Miter Setup Blocks to set the Rockler Precision Miter Gauge Angle. The Perfect Miter Setup Blocks are best for setting up miter angles for multi-sided frames, also called segmented frames. The blocks are especially helpful for frames that feature an odd number of sides, which require corners with uncommon miter angles. In this case we used the set up for a seven-sided frame, which is a 25.7 degree set up - not an easy angle to set. This exact angle is not critical to the success of this project. If you don't have the Perfect Miter Setup Blocks, you can set your miter gauge to an angle close to 25 or 22.5 degrees and the project will still work.
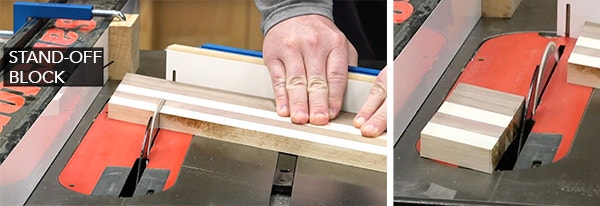
Set up a stand-off block on your table saw fence. Position the stand-off block 2-1/2" from the saw blade. The stand-off block provides a consistent place to register each cut. When the workpiece moves forward into the blade it moves off the stand-off block and will not ride on the fence, preventing binding and potential kickback. Cut eight segment blocks from pattern 1 and six segment blocks from pattern 2.
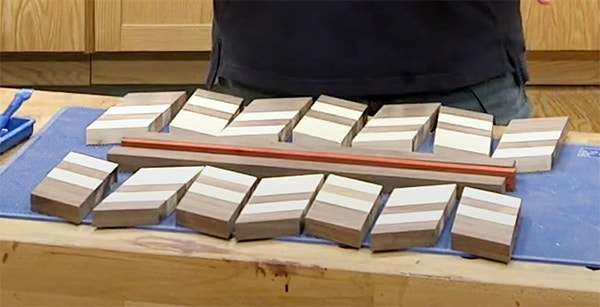
He's how the 14 blocks and center strips look before glue-up begins. Glue and clamp the segment blocks into two pattern blanks.
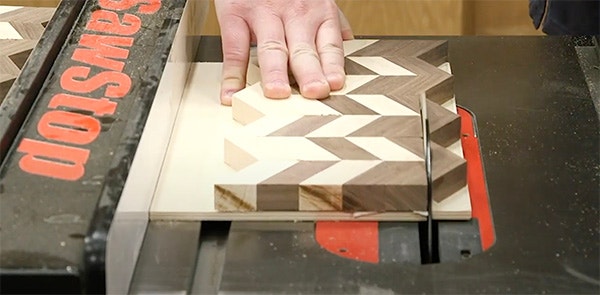
Rip the zig-zag edge off each pattern blank. We used a scrap piece of 1/4"-thick plywood as a sled to carry the pattern blank through the cut and give us a straight edge to ride along the fence. Use double-sided tape to secure the blank to the plywood sled before cutting. Next, glue up the blanks and the center stripes.

After the glue has dried, cut a 45-degree chamfer under the side edges to make the cutting board easier to lift up. Then sand all surfaces smooth and apply a coat of cutting board oil.

Keep the inspiration coming!
Subscribe to our newsletter for more woodworking tips and tricks