Coloring Walnut: A Simple Transformation
Adding life to a wan-looking piece of walnut can be the detail that takes a project from bland to beautiful. Learn how to make walnut look very much like it did in the good old days!
We may stain plain light-colored wood, but usually we leave dark wood natural. Walnut can be the exception to that rule, largely because of the way it is processed.
Most of the walnut we buy has been wet steamed, a process that turns the very light sapwood into something that approximates the darker (and more desirable) heartwood. Although the experts say it’s possible to steam walnut without damaging the heartwood color, it doesn’t often happen that way. Usually we end up buying uniformly dull walnut that has a decidedly purplish gray cast to it, making it visually disappointing even under a clear finish.
Kiln drying walnut can be done in a few different ways. Sometimes steam is added to the process either to prevent case hardening or to darken the color of the walnut’s sapwood. Sadly, this can cause the walnut to go gray.
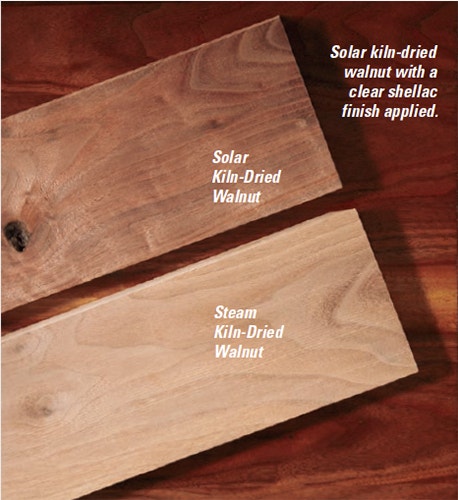
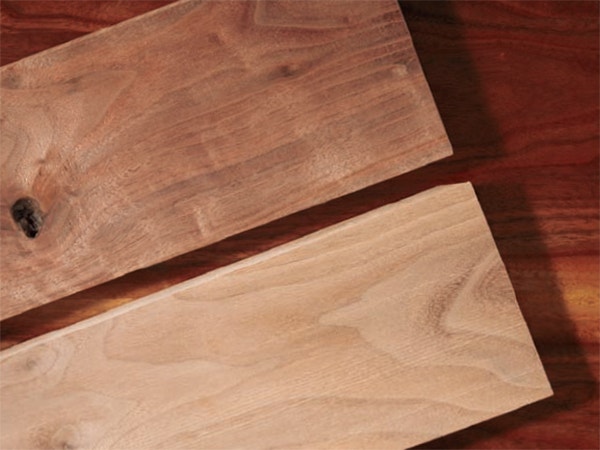
In the photo above, a piece of steamed walnut sits next to a piece of solar-dried walnut. The box below them is made from the same solar kiln-dried lumber.
Back to Brown
There are two easy ways to eliminate the gray, but as is often the case with shortcuts, both have drawbacks. You can apply boiled linseed oil or oil-based varnish directly to the raw wood, which will make it much darker, or you can apply a stain. Which stain you choose will control the final color, but it’s still likely to be rather monochromatic.
Fortunately, there is a coloring option that can remove the purplish gray cast, add more variance and color, and add the highlights that usually come with age. Unlike cherry, which darkens with age and light exposure, walnut gets lighter, developing a lovely golden glow, and this technique can mimic that.
Multi-level Coloring
The key is to split up your staining into two steps. First, apply an orange water-soluble dye stain to mask the purplish gray with reddish yellow highlights. Follow that with a pigment stain to add rich brown notes and intensify the grain pattern.
Mix red and yellow dyes into a relatively weak orange, which will color the wood without hiding any of its character. Flood it liberally onto the raw wood and wipe it all off immediately and thoroughly. That will kill the purple and gray, leaving the wood just a bit too bright, at least for realistic looking walnut.
Once the dye dries, seal it with a very thin (1 lb. cut) coat of dewaxed shellac. If you use SealCoat™, as I do, mix in equal parts alcohol. When that’s dry, stain the wood with a 100% pigment stain in chocolate brown, or whatever color you prefer. As you wipe off the excess pigment stain you will notice two things: that the dye shines through with a golden glow, and the pigment both blends it and, by collecting in the pores of the walnut, intensifies the wood’s grain pattern. Wipe off more or less of the pigment stain, depending on how dark you prefer it to be.
Once the stain is dry, you can continue with either another coat of shellac or go directly to whatever topcoat you choose. And yes, at this point you can use oil-based varnish without it darkening the walnut, because you’ve already sealed the wood with shellac.
As with all multiple-step coloring, make samples on scraps to find just the right dye and pigment combination for your tastes.


Keep the inspiration coming!
Subscribe to our newsletter for more woodworking tips and tricks