Choosing the Best Wood Sealer & Finish for Outdoor Furniture
Outdoor project finishing, like all finishing, begins well before you open a can of stain or finish. Wood, hardware and glue selections all matter, as does the wood species you choose and how you ultimately want the piece to look as it weathers.
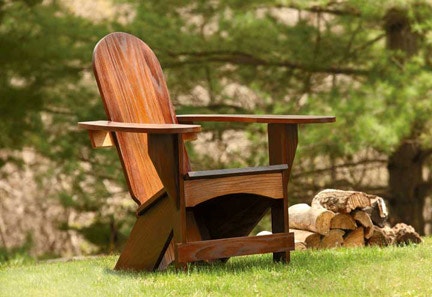
1. The first step in choosing an effective outdoor finish is picking a proper wood species. White oak, red cedar, Spanish cedar, cypress, redwood, long leaf pine, teak and true mahoganies are among the best species selections for withstanding rot and insect damage.
2. For many of the species just mentioned, not finishing them at all is a viable option. If you choose to do that, sanding them very smoothly will help keep them from deteriorating by lessening moisture penetration.
3. If you leave an outdoor project as just bare wood, and if it stains or streaks over time, you can refresh its look by giving it a good cleaning and then using oxalic acid as directed on the package. Your project will look brand-new!
4. In some climates, mildew can be a problem on outdoor furniture. Solve it by mixing one quart of laundry bleach in a gallon of water — then give the project a good cleaning with a scrub brush and the solution. Be sure to keep the solution away from plants, and wear gloves and protective eye wear!
5. Always use non-rusting fasteners and hardware (screws, nails, nuts and bolts and hinges) on your outdoor projects. This step will help prevent unsightly rust stains and streaks.
6. If you do get iron oxide streaking (rust stains), oxalic acid will remove that discoloration, too.
7. Outdoor oil finishes are fast and easy to apply and usually look great. The downside is that they must be reapplied every year — but remember, the process isn’t difficult.
8. Before you reapply or touch up any outdoor finish, be it oil, stain, etc., be sure to give the piece a good cleaning with soap and water. Allow it to dry completely and then apply the finish.
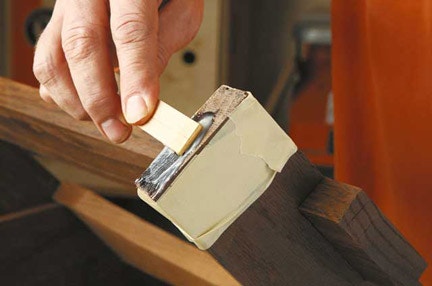
9. When finishing wooden outdoor tables and chairs, seal the end grain with clear epoxy (photo above). It will prevent moisture from wicking up the end grain. This is a technique called “packing.”
10. Clear finishes like spar varnish and exterior-grade polyurethane will break down in direct sunlight. Keep a close eye on the finish and recoat as soon as you see it starting to fade.
11. True spar varnish, as it is exposed to the elements, will tend to chalk from the top, which allows you to sand and recoat without stripping. Water-based exterior acrylic may last longer without maintenance but is more likely to delaminate — which requires stripping and refinishing completely.
12. Exterior-grade paint is the most robust exterior finish available. For best effect, pack the appropriate end grain areas with epoxy, apply a good quality, exterior-rated primer and follow with a high quality paint or enamel.
13. The new generation “green” exterior-rated clear acrylic waterborne finishes are a sound outdoor finishing choice. But remember, no finish will hold up forever under sun and rain — examine the finish regularly.
14. Keep your outdoor pieces out of direct sunlight whenever possible, especially during the “off” seasons.


Keep the inspiration coming!
Subscribe to our newsletter for more woodworking tips and tricks