Building High Gloss Finish from the Ground Up
Gloss finishes lend elegance to wood, both by reflecting light and by adding depth and clarity. Thus, a clear gloss finish should be transparent enough to see the wood beneath, and shiny enough to dazzle the eye. For that to happen, we'll need to choose a very clear finish, then level it to a fare-thee-well.
What Makes a Surface Appear Glossy?
Gloss is all about light reflection — the more light reflected, the glossier the surface. What reflects light best is a surface that is flat and smooth.
As light hits a surface, it is either reflected back to our eye at a complementary angle, or it is diffused (bounced in different directions). An uneven surface, one with open wood pores, or even one with fine scratches, will diffuse light rather than reflect it. Depending on how much light is diffused, the finished surface will appear semigloss, satin, or matte.
Since it is nearly impossible to apply a perfectly smooth finish right off the gun or brush, we take another tack: we build a finish thick enough to sand level and buff smooth. Though it may seem counterproductive, buffing uses successively finer abrasives, which technically create fine scratches. However, the surface looks glossy because those scratches are smaller than what the naked eye can detect.
Choosing the Finish
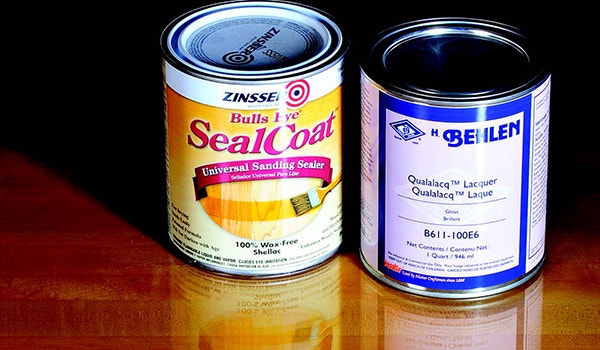
While you can, in theory, apply a finish so it comes out completely smooth and shiny without any need to buff it, in practice that is almost impossible. Thus, if we know we are going to have to sand and buff the last coat, it makes sense to choose a finish like shellac or lacquer.
Why shellac or lacquer? Almost any type of coating can be made flat simply by sanding and rubbing the surface until smooth. However, oil-based and most water-based coatings build up in discrete layers. While sanding and rubbing the final coat, it's easy to cut through to previous layers. Any place you cut through will show up as faint puddle-shaped outlines called "witness lines." To avoid them you'd have to ensure that the last coat was thick enough to be sanded and buffed without breaking through. That's possible, but difficult.
By contrast, each coat of shellac or lacquer melts into the previous ones. After building up the finish, you end up with one thick layer, and thus no witness lines. Shellac and lacquer also have fairly low melting temperatures, so the heat from buffing helps flow and blend out larger scratches. However, if you get too aggressive, and the surface gets too hot, you can melt off these finishes while trying to buff them. Life is full of tradeoffs; buff carefully.
Got Pores? Fill ‘Em

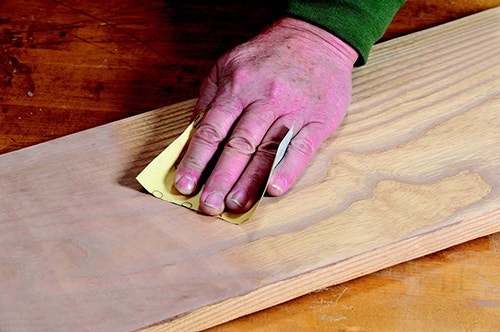
The easiest way to end up with a smooth surface is to start as flat as possible and keep it that way. Sand the raw wood very smooth and flat, then later sand out any dust nibs, brush marks, or orange peel as they come up.
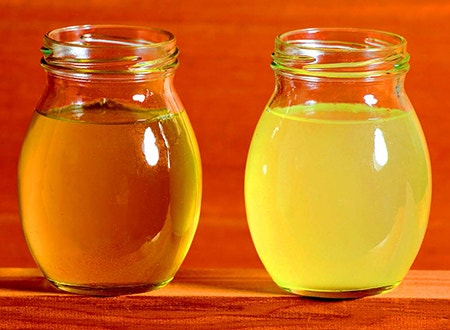
That brings up the issue of large pores in open grain woods like mahogany, walnut, koa, etc. To get a flat surface, those pores must be filled. You don’t want to fill them with finish because it keeps shrinking over time, and eventually those pores will show up again and mar your otherwise smooth surface. Instead, fill the pores first with an inert material that will not shrink. Not surprisingly, it’s called pore filler.
While you can buy oil-based pore filler, I vastly prefer water-based filler. It can go directly onto raw wood, but I usually apply it after the first thin coat of finish. Either way, the application method is the same.
Most water-based fillers are sold extra thick, so mix them with water to the consistency of cream. Scrub the filler into the pores with fine ScotchBrite®, then remove the excess immediately. I squeegee off the excess with an old credit card held at right angles to the grain, and pulled in the direction of the grain. Remove as much as possible with the card; the object is to leave filler only in the pores. Let it dry overnight, then lightly sand off any residue with 320-grit paper.
Build with Gloss
Build the entire finish in gloss. Yes, you can flatten a satin or matte finish smooth enough to reflect light, but thanks to the flatting agent in it, the finish will look hazy. Start with smooth, flat wood, and keep each layer as flat and smooth as possible.
After building up several coats, block sand the surface so there are no pores or grain lines showing. You don't need to sand between every coat, but do remove any pores or dust nibs before the last coat. Add as many coats as you need for the look you want, but make sure that last coat goes over a very smooth previous one. To that end, I sand with 600-grit before applying my final coat.
Level and Buff
Give the finish plenty of time to dry. The drier it is, the faster and easier it is to buff to gloss. I generally let lacquer dry six weeks after the final coat before sanding and buffing.
Level the finish by sanding it dead smooth with 600-grit paper, then go up through the grits to 1,200, or whatever is the finest paper in your shop. This may seem tedious, but more sanding now means less buffing afterward.
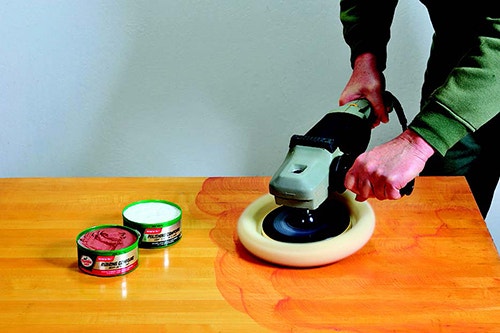
You can rub by hand, or use a low-speed automotive buffer. Start with rubbing compound, which is coarser than polishing compound. Depending on how fine you sanded, you may be able to go directly to polishing compound. If not, remove all the rubbing compound from the finished surface and from the buffer head before switching to polishing compound, or use different buffing heads for rubbing and polishing compounds.
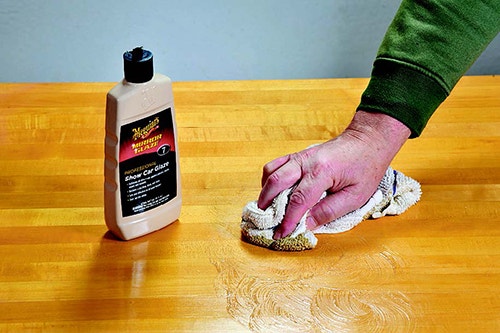
At this point you should see a beautiful gloss. Still want more? For an extra fillip of shine, wipe on swirl mark remover (or automotive polish, as shown), then wipe it off again with a clean, soft cloth.


Keep the inspiration coming!
Subscribe to our newsletter for more woodworking tips and tricks