Bookmatch Larger Veneer Wood Sheets by Splicing and Joining
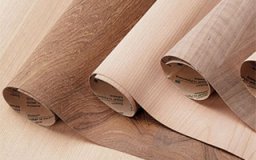
Wooodworkers I talk to who haven't tried working with veneers tend to think that it's just too difficult. This couldn't be further from the truth. Veneering is an easy woodworking technique that is both fun and creative. In the last issue I covered the simple task of veneering a drawer face. This time you'll learn to successfully splice and join veneer sheets together, allowing you to cover any surface that's wider than one single veneer sheet. The variety of possibilities is almost endless, but this time I'll stick with the most commonly used pattern, known as a bookmatch. A bookmatch is a pattern developed by simply joining the veneers in mirror image strips. Each piece of veneer is spliced to its neighbor so that the grain pattern of the left sheet faces the grain pattern on the right sheet. If you made a panel with several of these matching strips of veneer you'd end up with a series of mirror images across the entire width of the piece. Joining veneers by making a filtch. Plane sliced veneer creates a simple mirror image, but if the grain is wilder you get different effects by varying the joined edges.
Start With A Flitch
If you're going to be joining veneer for a bookmatch, the first thing you have to be sure of is to purchase sheets of veneer that have been cut consecutively from the same log. The resulting stack of veneer is called a flitch. Always be sure to arrange the sheets in the same order as they were cut. Take the top two sheets from the stack and lay them out edge to edge, then flip one of these sheets over. The grain figure of each piece should be a mirror image of the other. There's your bookmatch! Depending on the grain pattern of the veneer sheets, you can get entirely different bookmatches by varying the edges you choose to join. Once you get the bookmatch you want, then mark the edges that will be spliced and joined.
Joining wood veneer sheets with a jointer fence. To join veneer sheets, sandwich them between a piece of solid stock and the jointer fence, then pass the material over the blades. Now square and straighten, or splice, the edges being joined. I like to do this on my jointer using the following technique. Set the veneer sheet faces against the jointer's fence. Place a solid piece of wood against the veneers to hold them flat against the fence and down to the jointer's table. Make a few passes across the jointer until you've cut square and straight edges on the entire length of the veneers. Butt the spliced veneer edges together and make sure you have a good joint. An alternative method of splicing the veneer edges is to rout them. Do this by clamping the veneer sheets over a straight edged board and routing the veneer edges with a flush trimming router bit. The success of this method depends on the absolute straightness of your board, for if there is any deviation the resulting gap in the joint will be doubled when the veneer edges are brought together.
Use masking tape spanning the joint at four inch intervals to hold the veneer sheets together Use masking tape spanning the joint at four inch intervals to hold the veneer sheets together. You're now ready to join the spliced edges of the two veneer sheets and make one wide sheet that can then be glued to a core. To do this you'll need to purchase a special kind of tape called veneer tape. Veneer tape is very thin paper with water ' soluble glue on one side. It's sold in rolls and available from most veneer suppliers in two different types, perforated and non-perforated. I like the perforated veneer tape because it's so thin it can be glued between the veneer and the core without telegraphing through the finished face of the veneer. This makes things a lot easier because you don't have to remove the tape from the veneer sheet before you glue the veneer to the core. Start the veneer joining by tightly butting the spliced edges together and holding them together with short pieces of masking tape placed along the joint at four inch intervals. Carefully flip the veneer sheets over so the masking tape side is face down against your workbench.
Making larger veneer sheets with veneer tape. Flip the veneer over, glue perforated tape on the splice, and remove the masking tape. Now cut a piece of veneer tape to cover the length of the joint, then wet the tape's glue and place the tape over the joint. Set a heavy trip of wood over the veneer taped joint to hold it flat as the tape's glue dries for a couple of hours. When the veneer tape has dried, flip the veneer sheets over and remove the tape.
Finishing the veneer sheets. Carefully fold open the joint and glue the spliced edges together to complete the bookmatch. Align the joint over an edge on your workbench. Carefully open the joint, letting the veneer tape act as a hinge, apply a light bead of glue to the spliced edges and close the joint. Place a heavy strip of wood on each side of the glued joint to hold the veneers flat and the joint closed. When the glue has partially cured, carefully scrape away any excess that has oozed from the joint. Let the glue completely cure and you're ready to glue and clamp the assembled sheet to its core, as described in the last issue. That's it, five simple steps. Just remember that the real key to bookmatching is to be sure to order your veneer from the same flitch.


Keep the inspiration coming!
Subscribe to our newsletter for more woodworking tips and tricks