Best Ways to Organize Your Cabinet Drawers

What is the best drawer organization system? That depends on what your storing in the drawer. In this Rockler demonstration you'll learn three solutions that will help you organize your drawers. We'll show you two drawer insert options and a way to capture wasted space in deep drawers.
WATCH: Three Ways to Organize Your Drawers
Rockler Lock-Align Drawer Organizer System
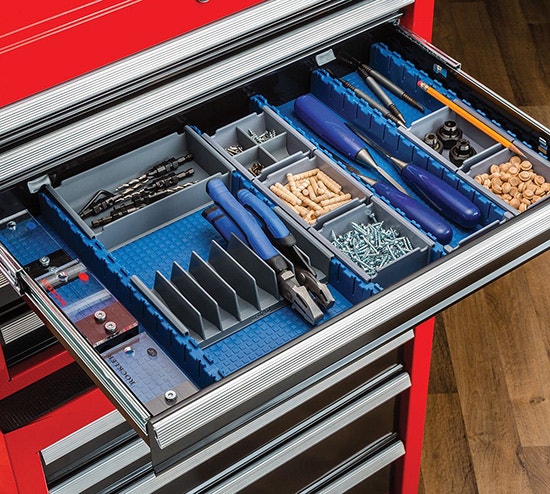
The Rockler Lock-Align Drawer Organizer System features interlocking trays, bins, inserts and dividers that can be combined to build a tidy grid of compartments that makes it easy to find what you need, fast. Simply add trays as needed to fill out drawers of any width or depth. The trays are made from a synthetic rubber material that is easy-to-cut, and the grid of cutlines on the back side ensures that the interlocking feature still works once the tray is cut.
Rockler Foam Organizer Sheets
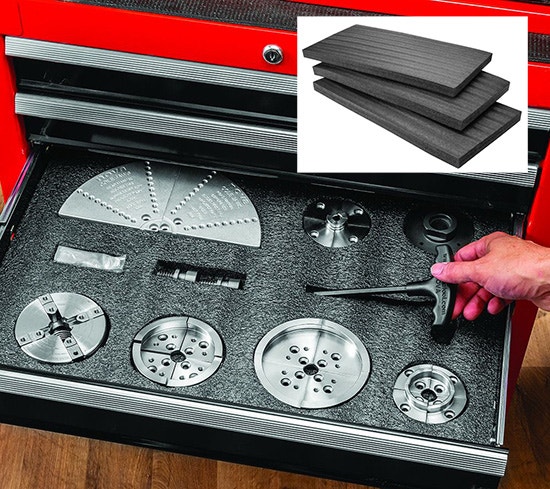
The Rockler Foam Organizer Sheets let you easily create custom-sized drawer inserts that fit your tools like a glove. Simply lay out your tools on the sheet, trace around them with a marker, cut the outlines with a utility knife, then remove layers like an orange peel until you reach the desired depth. Your tools will stay exactly where you want them, and protect any cutting edges from damage. The sheets come in 2' x 4' sections that can be easily subdivided with a table saw to make drawer liners for smaller toolboxes.
Drawer Inside a Drawer
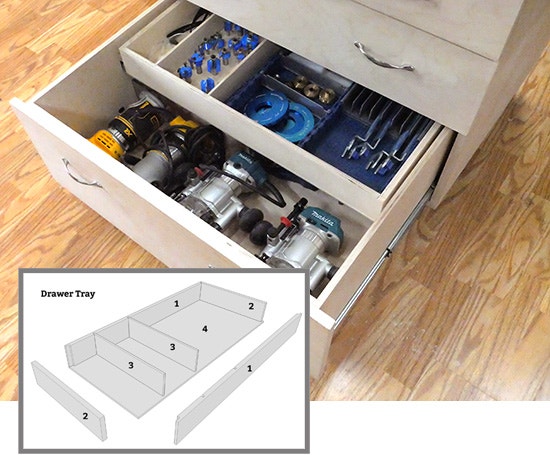
Deep drawers are great for larger tools, but they can create problems when when you pile in too many small tools or you leave a lot of wasted space. This shallow tray is installed inside a larger drawer. It is half the depth of the larger drawer to allow access to the lower contents. You must first attach the drawer slides to the tray and then install the slides and tray in the larger drawer.
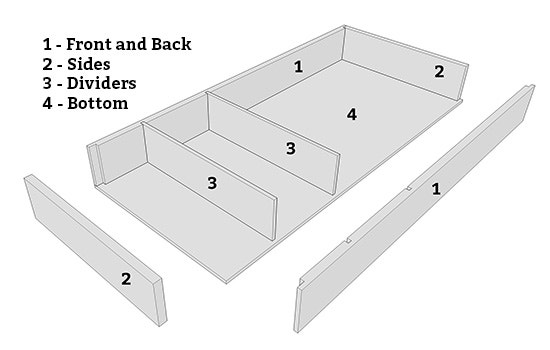
Building Instructions
The sizes of each part will depend on the dimensions of the larger drawer. The width of the finished interior tray will be 1" less than the width of the large drawer interior to account for the ball-bearing drawer slides. The length of the Front and Back (part 1) is equal to the width of the tray. The overall length (measuring front to back) of the drawer is equal to the length of the drawer slides. In this case we used 12" drawer slides . The length of the Sides (part 2) is 1/2" less than the overall length of the drawer, so in this case the sides are 11-1/2". The height of the tray you make will depend on the depth of the large drawer. The tray should be at least 2" high. The Bottom (part 4) dimensions are the same as the length and width of the overall tray.
1. Measure the interior width of the large drawer to determine the width of the tray.
2. Cut the sides, front and back out of 1/2"-thick plywood. Cut the two side pieces as a single piece and the front and back as a single piece. Before ripping the parts to final width, cut any dadoes you will need for dividers. This will ensure that they line up across the tray. The divider dadoes are 1/4"-wide x 1/4"-deep.
3. Cut 1/2"-wide x 1/4"-deep rabbets on each end of the front and back.
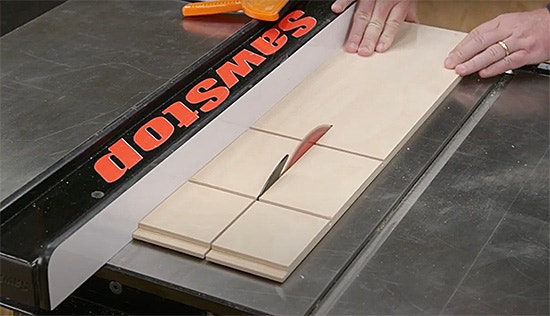
4. Rip the sides, front and back to the final width (photo below).
7. Dry assemble the frame.
8. Cut the dividers and bottom from 1/4”-thick plywood.
9. Assemble the tray with glue and clamps. (photo below)
10. Attach the drawer slides to the tray.
11. Install tray and slides to drawer box. (photo below)


Keep the inspiration coming!
Subscribe to our newsletter for more woodworking tips and tricks